AWS Elastic Beanstalk - Deploy Java Web App on Tomcat
- Details
- Written by Nam Ha Minh
- Last Updated on 06 February 2024 | Print Email
 You can download the code and deployment artifact (WAR file) in this article. Table of content:1. Package a WAR file
2. Create an AWS Account
3. Create an IAM User
4. Grasp Elastic Beanstalk Key Concepts
5. Create New Application - Configure environment
6. Configure Service Access
7. Configure Environment Properties
8. Deploy the Application
9. Access Newly Deployed Application
10. Check AWS Services Used
11. Terminate an Environment
12. Undeploy the Application
1. Package a WAR file
The first step is creating deployment artifact of your Java web project. In other words, you need to package the build of your application in a Web ARchive (WAR) file, which can be deployed on AWS. You can generate WAR file using your favorite IDE or using Maven.2. Create an AWS Account
The next step is creating an account on Amazon Web Services website if you don’t have one. Follow this video for the detailed steps.NOTES:AWS requires account verification using a valid credit/debit card. You’ll be charged a small amount, which will be reverted later.The AWS account you create in this step is the root user.3. Create an IAM User
Under the AWS root user, you can create IAM users which are granted different permissions to work with different services. IAM stands for Identity and Access Management - an AWS service that is used to control access to AWS resources.Follow this video to create an IAM user with administrative access. You will sign in as this IAM user instead of the root one to deploy your application.4. Grasp Elastic Beanstalk Key Concepts
It’s important to understand some core concepts used by Elastic Beanstalk, so you will find deployment process easy to follow. Let check the following Elastic Beanstalk concepts:- Application is a logical collection of environments, versions and environment configurations
- Version is a specific, labeled iteration of deployable code for an application
- Environment is a collection of resources running an application version
- Environmentconfiguration is collection of parameters and settings that define how an environment and its associated resources behave
- An application can have many versions and each version is unique
- Each environment runs only one application version at a time
- You can run the same app version or different app versions in many environments simultaneously
5. Create New Application - Configure environment
Head over to AWS management console and sign in as an IAM user with administrative access. And firstly, choose the AWS Region of your choice, e.g. US East (Ohio) from the menu at top right corner.To open Elastic Beanstalk management console, click menu Services > Compute > Elastic Beanstalk. Then click Create application button: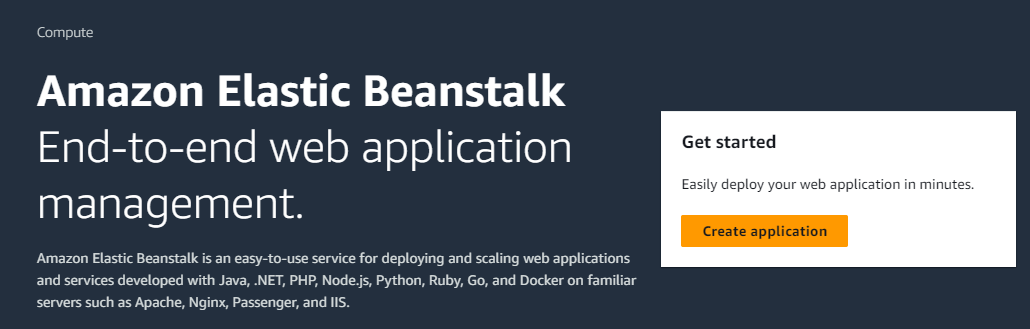 The first step of deployment is Configure environment. The default environment tier is Web server environment, which is for running a website.Then enter your application name, e.g. My Java Web App:
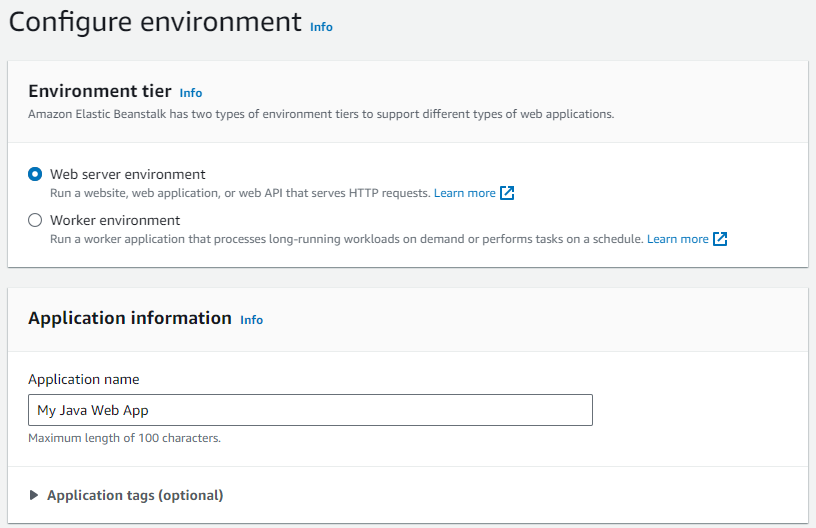 After you enter application name, it will suggest environment name (adding -env suffix). Then specify subdomain that constitutes the full URL of the website, as shown below in the Environment information section:
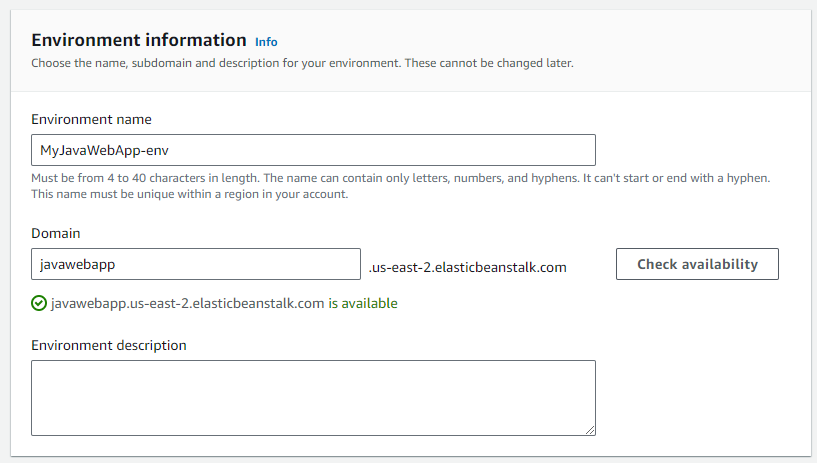 Click Check availability button. You need to change subdomain until it says available. In the above configuration, the deployed website will be accessible via the URL javawebapp.us-east-2.elasticbeanstalk.com.Next, under Platform section. Choose Tomcat for Platform, and choose the Tomcat version you wish to use:- Tomcat 9 running with Java 8, 11 or 17. Amazon uses Corretto which is based on JDK- Tomcat 10 running with Java 17
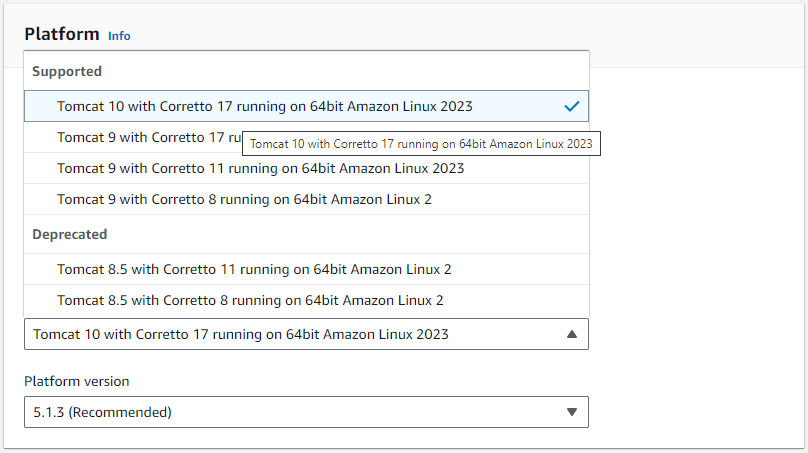 The final configuration for Platform would look like this:
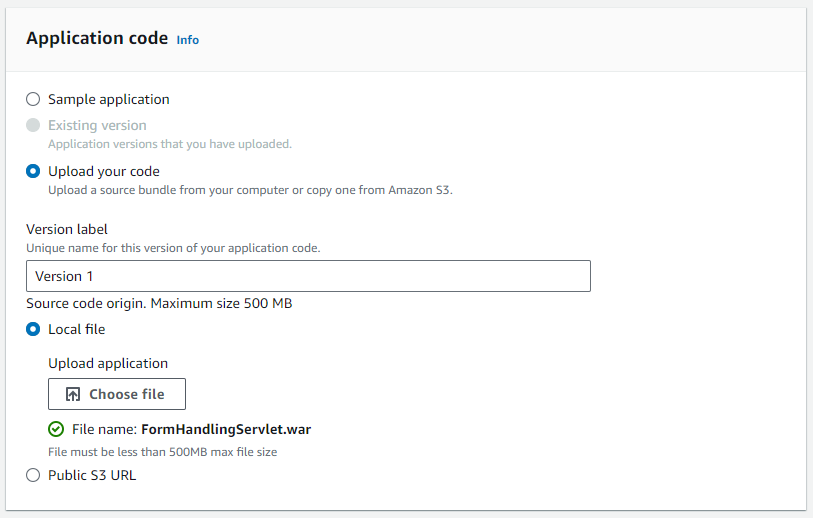
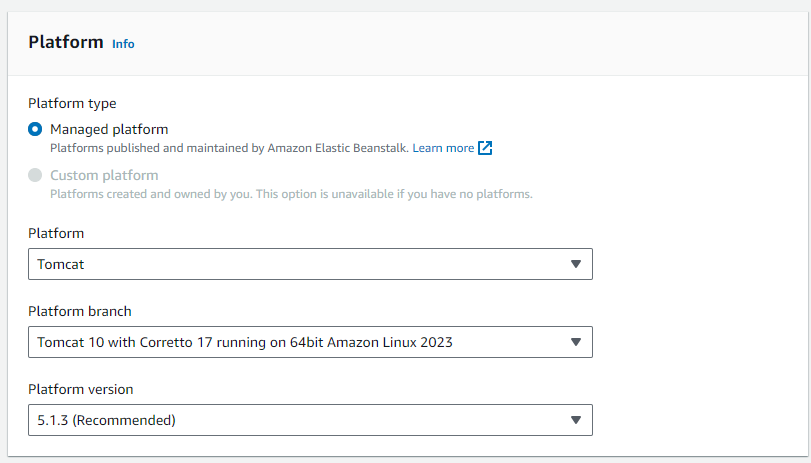 Next, we need to upload the application code under Application code section, following these steps:
- choose Upload your code
- enter version name, e.g. Version 1.
- click Local file. Then choose the WAR file created in the step “Package a WAR file”
 The last thing in this step is choosing an instance type for virtual servers in the Presets section. For testing purpose, we can choose Single instance, free tier eligible or using spot instance:
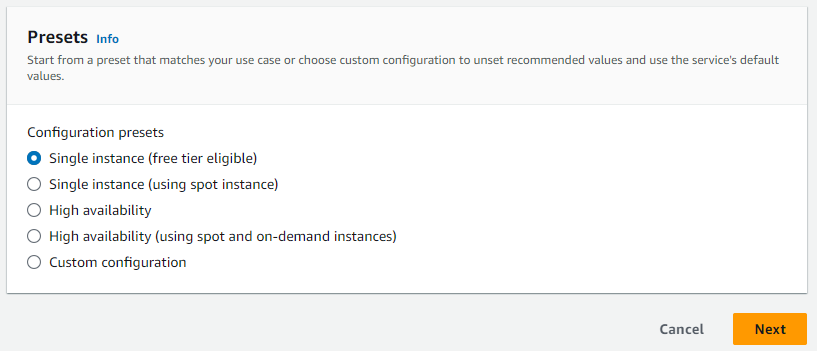 Click Next to go to the 2nd deployment step, as described below.
 6. Configure Service Access
The 2nd step of deployment on Elastic Beanstalk is Configure service access, in which we specify IAM roles used as service role and EC2 instance. Follow instructions described in the Configure Service Access step in this article. You’ll end up with something like in the following screen: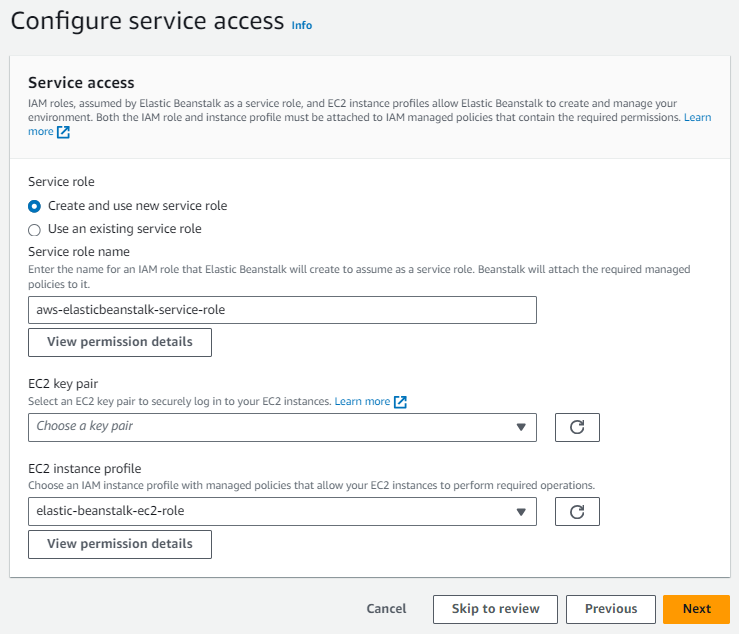 Now, click Next to go to Step 3 (Set up networking, database and tags) which is optional. Click Next to go to Step 4 which is also optional.Click Next to go to Step 5 which is described as below.
 7. Configure Environment Properties
In this step, Configure updates, monitoring and logging - we need to add an environment variable that specifies HTTP port number of Tomcat server.You know, by default Tomcat listens on port number 8080 whereas Elastic Beanstalk assumes that the application listens on port 5000. That’s why we need to override the Tomcat’s default port number through environment variable.Scroll to the end of the page, then click Add environment property with:- name: CATALINA_BASE_PORT- value: 5000Until now, it should look like this: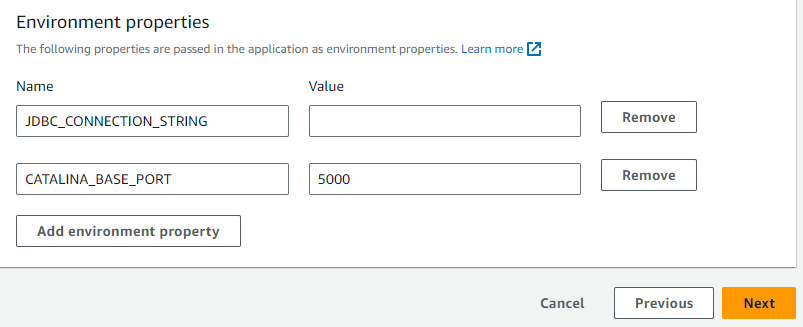 Click Next to go to the Step 6 (Review). Review all the configurations specified so far. If you need to modify something, click Edit button in each step.
 8. Deploy the Application
On the review page, click Submit button to start the deployment process. It may take few minutes for AWS to provision necessary resources (virtual server, networking, etc). During the deployment, you can see the messages updated frequently under the Evens tab, so you can see the details of deployment - what is done, what is in progress, and so on.When the deployment is successful, you should see the following screen: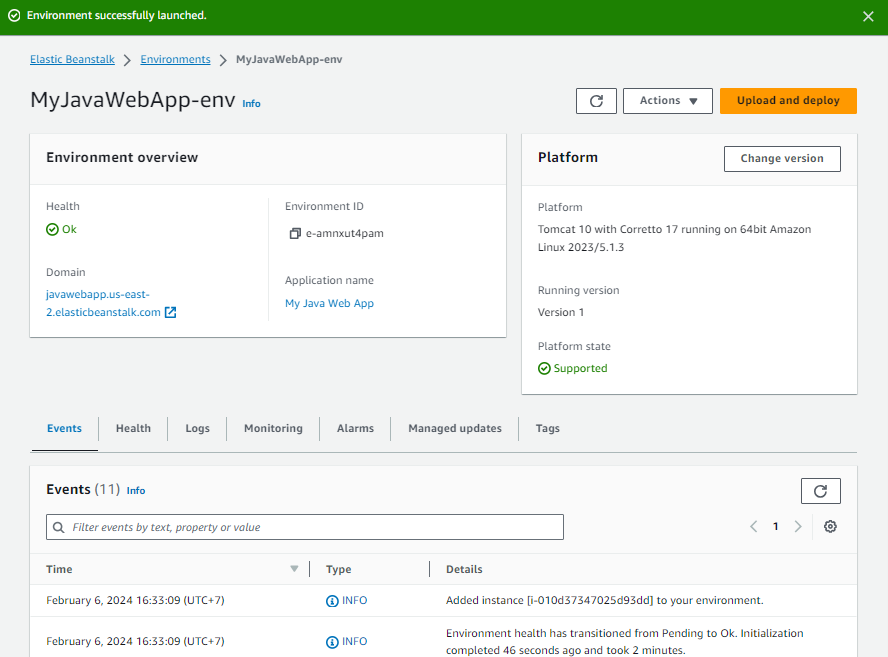 This is dashboard of the current environment. You can see health status is Ok and the running version is Version 1. If something went wrong (an error occur or the health status is not Ok), you can check the logs of server in the Logs tab to identify the causes.
 9. Access Newly Deployed Application
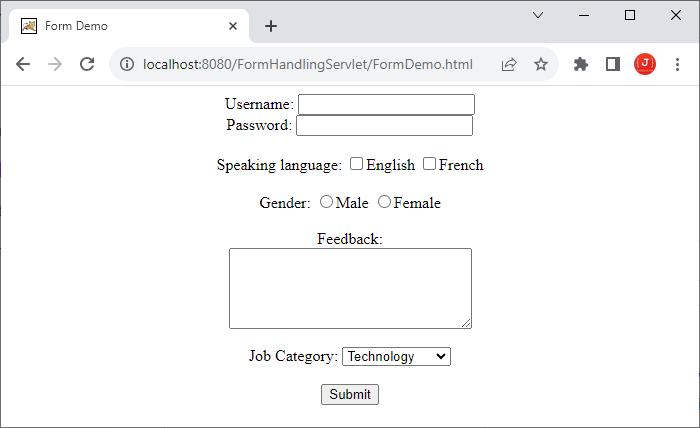
Now, the web application is hosted on AWS. Click the hyperlink under Domain field in Environment overview, to access the newly deployed application: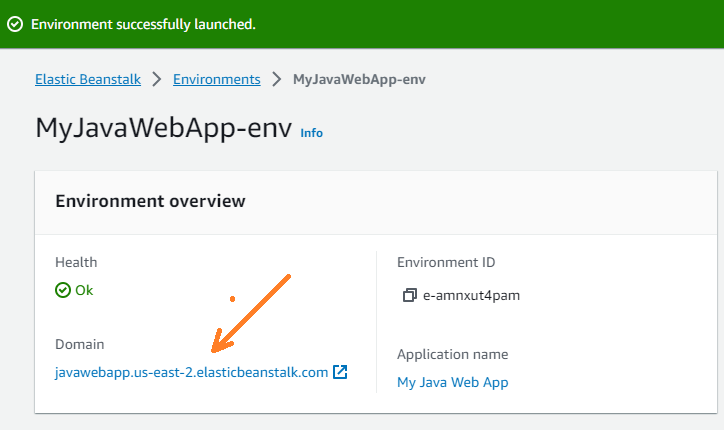 Then you should see the homepage of the application. For example:
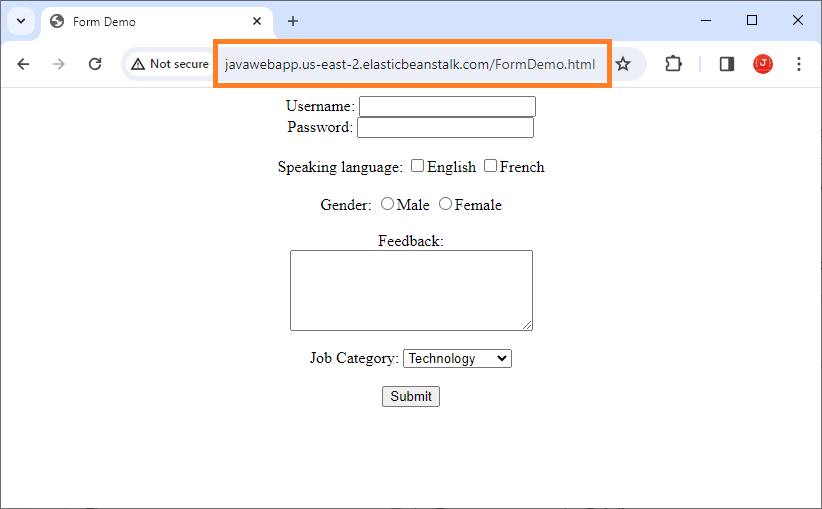 You can notice the URL of the application is what specified in the Environment information section.Congratulations! You have deployed a Tomcat-based Java web application on AWS Cloud using Elastic Beanstalk web management console.
 10. Check AWS Services Used
You can check the AWS services provisioned as the result of deployment. There are at least 3 services being used: EC2, IAM and S3.- EC2: this service creates virtual server instances that run the application. If the Preset type is Single instance, you will see only one EC2 instance listed in Services > Compute > EC2- IAM: this service is used to create/update roles and permissions that are required by Elastic Beanstalk for the deployment process and other services. For details, go to Services > Security, identity & Compliance > IAM- S3: your application’s deployment artifact (WAR) will be stored in a bucket managed by this service. For details, go to Services > Storage > S3Depending on the environment configurations, there may be more services provisioned, e.g. RDS for relational database.11. Terminate an Environment
If you want to stop the application temporarily, you can terminate the environment that runs the version that needs to be paused.To terminate an environment, go to Elastic Beanstalk > Environments > select the environment > click Actions > Terminate environment: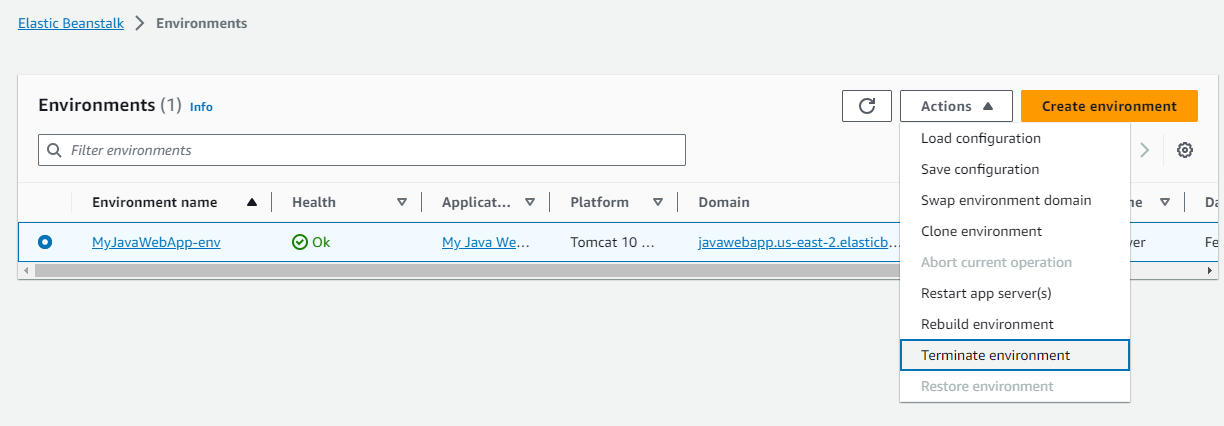 When you want to restart a terminated environment, click Actions > Restore environment.
 12. Undeploy the Application
When you want to remove an application from AWS, go to Elastic Beanstalk > Applications > select an application > click Actions > Delete application: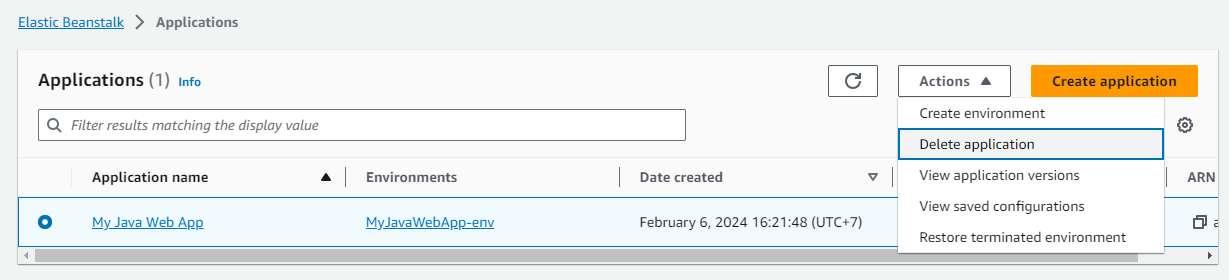
About the Author:
 Nam Ha Minh is certified Java programmer (SCJP and SCWCD). He started programming with Java in the time of Java 1.4 and has been falling in love with Java since then. Make friend with him on Facebook and watch his Java videos you YouTube.