- Details
- Written by Nam Ha Minh
- Last Updated on 02 July 2019 | Print Email
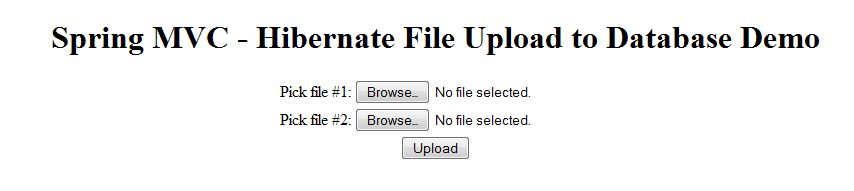
This tutorial walks you through the steps of building an interesting Spring MVC web application that allows the user to upload files from her computer to the server. The files are stored in database using Hibernate. Here’s a screenshot of the file upload form:
This sample application is built based on the combination of the following tutorials:
At a glance, we use the following technologies and pieces of software to develop the application:
The above list is our recommendation, you can use newer versions. However you can use similar versions if you already installed the different ones. Now, let’s see how to build the database file upload application with Spring and Hibernate in step-by-step.
1. Creating Database
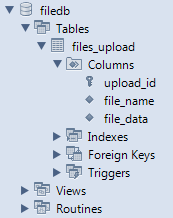
Because our application is for uploading files to database so we need to create a database and a table in MySQL server. Execute the following SQL script to create a database called
filedb with a table called
files_upload:
CREATE DATABASE `filedb`;

CREATE TABLE `files_upload` (
  `upload_id` int(11) NOT NULL AUTO_INCREMENT,
  `file_name` varchar(128) DEFAULT NULL,
  `file_data` longblob,
  PRIMARY KEY (`upload_id`)
)
This ends up with the following database structure:
2. Configuring Maven Dependencies
Add the following dependencies declaration to the Maven’s project file -
pom.xml:
- Versions for Java and Spring framework:
<properties>
	<java-version>1.7</java-version>
	<org.springframework-version>4.1.1.RELEASE</org.springframework-version>
</properties>
- Spring framework dependencies:
<dependency>
	<groupId>org.springframework</groupId>
	<artifactId>spring-context</artifactId>
	<version>${org.springframework-version}</version>
</dependency>

<dependency>
	<groupId>org.springframework</groupId>
	<artifactId>spring-webmvc</artifactId>
	<version>${org.springframework-version}</version>
</dependency>
<dependency>
	<groupId>org.springframework</groupId>
	<artifactId>spring-orm</artifactId>
	<version>${org.springframework-version}</version>
	<type>jar</type>
	<scope>compile</scope>
</dependency> - Hibernate ORM framework dependencies:
<dependency>
	<groupId>org.hibernate</groupId>
	<artifactId>hibernate-core</artifactId>
	<version>4.3.6.Final</version>
</dependency>
- Java Servlet and JSP dependencies (for compilation only):
<dependency>
	<groupId>javax.servlet</groupId>
	<artifactId>javax.servlet-api</artifactId>
	<version>3.1.0</version>
	<scope>provided</scope>
</dependency>
<dependency>
	<groupId>javax.servlet.jsp</groupId>
	<artifactId>javax.servlet.jsp-api</artifactId>
	<version>2.3.1</version>
	<scope>provided</scope>
</dependency>
- Apache Commons DBCP dependency (for database connection pooling):
<dependency>
	<groupId>org.apache.commons</groupId>
	<artifactId>commons-dbcp2</artifactId>
	<version>2.0</version>
</dependency>
- MySQL Connector Java dependency (JDBC driver for MySQL):
<dependency>
	<groupId>mysql</groupId>
	<artifactId>mysql-connector-java</artifactId>
	<version>5.1.30</version>
</dependency>
- Apache Commons FileUpload dependency:
<dependency>
  <groupId>commons-fileupload</groupId>
  <artifactId>commons-fileupload</artifactId>
  <version>1.3.1</version>
</dependency>
NOTE: You can see the whole content of
pom.xml file in the attached project.
3. Writing Upload Form
Code the upload page (
Upload.jsp) as the following code snippet:
<%@ page language="java" contentType="text/html; charset=UTF-8"
    pageEncoding="UTF-8"%>
<!DOCTYPE html PUBLIC "-//W3C//DTD HTML 4.01 Transitional//EN"
     "http://www.w3.org/TR/html4/loose.dtd">
<html>
<head>
<meta http-equiv="Content-Type" content="text/html; charset=UTF-8">
<title>Spring MVC - Hibernate File Upload to Database Demo</title>
</head>
<body>
    <div align="center">
        <h1>Spring MVC - Hibernate File Upload to Database Demo</h1>
        <form method="post" action="doUpload" enctype="multipart/form-data">
            <table border="0">
                <tr>
                    <td>Pick file #1:</td>
                    <td><input type="file" name="fileUpload" size="50" /></td>
                </tr>
                <tr>
                    <td>Pick file #2:</td>
                    <td><input type="file" name="fileUpload" size="50" /></td>
                </tr>
                <tr>
                    <td colspan="2" align="center"><input type="submit" value="Upload" /></td>
                </tr>
            </table>
        </form>
    </div>
</body>
</html>
This JSP page simply displays two fields that allow the user to pick two files from her computer to upload.
4. Writing Model Class with JPA Annotations
We need to write a POJO class to represent an upload file. Create
UploadFile.java file with the following code:
package net.codejava.fileupload.model;

import javax.persistence.Column;
import javax.persistence.Entity;
import javax.persistence.GeneratedValue;
import javax.persistence.Id;
import javax.persistence.Table;

@Entity
@Table(name = "FILES_UPLOAD")
public class UploadFile {
	private long id;
	private String fileName;
	private byte[] data;

	@Id
	@GeneratedValue
	@Column(name = "FILE_ID")
	public long getId() {
		return id;
	}

	public void setId(long id) {
		this.id = id;
	}

	@Column(name = "FILE_NAME")
	public String getFileName() {
		return fileName;
	}

	public void setFileName(String fileName) {
		this.fileName = fileName;
	}

	@Column(name = "FILE_DATA")
	public byte[] getData() {
		return data;
	}

	public void setData(byte[] data) {
		this.data = data;
	}
}
As we can see, JPA annotations are used to map this model class to the database table, very straightforward.
5. Implementing DAO Classes
We need to implement DAO classes to save the upload files to database.Declare an interface
FileUploadDAO as the following code:
package net.codejava.fileupload.dao;

import net.codejava.fileupload.model.UploadFile;

public interface FileUploadDAO {
	void save(UploadFile uploadFile);
}
And here’s code of the implementation class:
package net.codejava.fileupload.dao;

import org.hibernate.SessionFactory;
import org.springframework.beans.factory.annotation.Autowired;
import org.springframework.stereotype.Repository;
import org.springframework.transaction.annotation.Transactional;

import net.codejava.fileupload.model.UploadFile;

@Repository
public class FileUploadDAOImpl implements FileUploadDAO {
	@Autowired
	private SessionFactory sessionFactory;

	public FileUploadDAOImpl() {
	}

	public FileUploadDAOImpl(SessionFactory sessionFactory) {
		this.sessionFactory = sessionFactory;
	}

	@Override
	@Transactional
	public void save(UploadFile uploadFile) {
		sessionFactory.getCurrentSession().save(uploadFile);
	}
}
As we use Hibernate integration, the DAO code is very simple and minimal.
6. Configuring DAO and MultipartResolver Beans
Because the project is using Java-based configuration, add the following code for creating two new beans in the
ApplicationContextConfig class:
- Instantiation for DAO bean:
@Autowired
@Bean(name = "fileUploadDao")
public FileUploadDAO getUserDao(SessionFactory sessionFactory) {
	return new FileUploadDAOImpl(sessionFactory);
} - Instantiation for CommonsMultipartResolver bean: Spring needs this bean in order to intercept the request to read upload files.
@Bean(name = "multipartResolver")
public CommonsMultipartResolver getCommonsMultipartResolver() {
	CommonsMultipartResolver multipartResolver = new CommonsMultipartResolver();
	multipartResolver.setMaxUploadSize(20971520);	// 20MB
	multipartResolver.setMaxInMemorySize(1048576);	// 1MB
	return multipartResolver;
} - And remember to update the DataSource bean to connect to the right database (filedb):
@Bean(name = "dataSource")
public DataSource getDataSource() {
	BasicDataSource dataSource = new BasicDataSource();
	dataSource.setDriverClassName("com.mysql.jdbc.Driver");
	dataSource.setUrl("jdbc:mysql://localhost:3306/filedb");
	dataSource.setUsername("root");
	dataSource.setPassword("secret");

	return dataSource;
}
NOTE: Other beans instantiation (mostly for Hibernate - Spring integration) is as same as the tutorial:
Spring 4 and Hibernate 4 Integration Tutorial Part 2: Java-based Configuration 7. Coding Controller Class
The controller class connects everything together as it specifies workflow of the application. Code the
HomeController class with the following content:
package net.codejava.fileupload.controller;

import javax.servlet.http.HttpServletRequest;

import net.codejava.fileupload.dao.FileUploadDAO;
import net.codejava.fileupload.model.UploadFile;

import org.springframework.beans.factory.annotation.Autowired;
import org.springframework.stereotype.Controller;
import org.springframework.web.bind.annotation.RequestMapping;
import org.springframework.web.bind.annotation.RequestMethod;
import org.springframework.web.bind.annotation.RequestParam;
import org.springframework.web.multipart.commons.CommonsMultipartFile;

/**
 * Handles requests for the file upload page.
 */
@Controller
public class HomeController {
	@Autowired
	private FileUploadDAO fileUploadDao;

	@RequestMapping(value = "/", method = RequestMethod.GET)
	public String showUploadForm(HttpServletRequest request) {
		return "Upload";
	}

    @RequestMapping(value = "/doUpload", method = RequestMethod.POST)
    public String handleFileUpload(HttpServletRequest request,
            @RequestParam CommonsMultipartFile[] fileUpload) throws Exception {

        if (fileUpload != null && fileUpload.length > 0) {
            for (CommonsMultipartFile aFile : fileUpload){

                System.out.println("Saving file: " + aFile.getOriginalFilename());

                UploadFile uploadFile = new UploadFile();
                uploadFile.setFileName(aFile.getOriginalFilename());
                uploadFile.setData(aFile.getBytes());
                fileUploadDao.save(uploadFile);
            }
        }

        return "Success";
    }
}
Code of this controller class is pretty straightforward simple as well:
- An implementation of the FileUploadDAO will be injected automatically (autowired) by Spring, as long as there is corresponding bean instantiation in the ApplicationContextConfig class.
- The showUploadForm() method simply redirects the user to the upload page which is identified by the logical view name “Upload”.
- The handleFileUpload() method handles submission from the upload page. It iterates through an array of upload files and save every file to the database via the fileUploadDao. And finally it redirects the user to a success page that simply displays a message telling the user that the file upload has been done.
Code of the
Success.jsp page:
<%@ page language="java" contentType="text/html; charset=UTF-8"
    pageEncoding="UTF-8"%>
<!DOCTYPE html PUBLIC "-//W3C//DTD HTML 4.01 Transitional//EN" "http://www.w3.org/TR/html4/loose.dtd">
<html>
<head>
<meta http-equiv="Content-Type" content="text/html; charset=UTF-8">
<title>Upload Done</title>
</head>
<body>
	<div align="center">
		<h1>Files have been uploaded successfully!</h1>
	</div>
</body>
</html>
8. Testing the Application
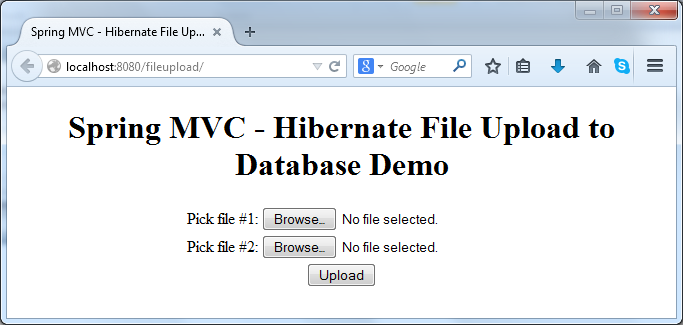
So far we have done all the coding part. Let’s test the application now. Make sure you deployed the application on Tomcat and the server is started. Type the following URL in your browser:
http://localhost:8080/fileuploadThe upload page gets displayed as shown in the following screenshot:
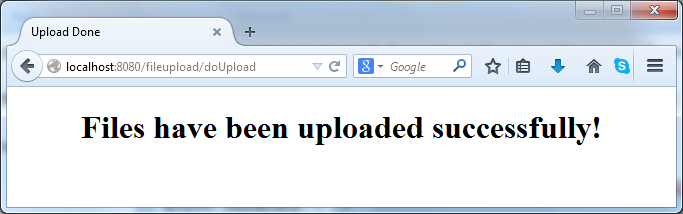
Choose two files from your computer and hit
Upload. If everything is going fine, you would see the following page:
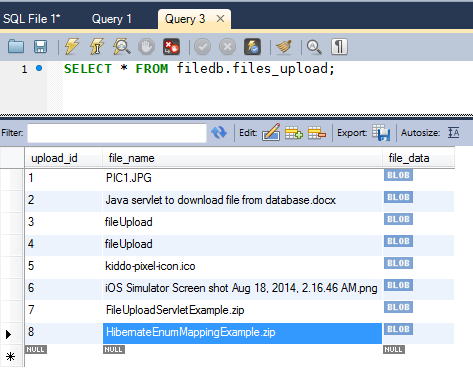
And don’t forget to check the database to see if the files are actually saved:
That’s it! You have built an interesting Spring-Hibernate web application for uploading files into database. For your convenience, we provide the sample project under the attachments section.
Related Java File Upload Tutorials:
About the Author:
 Nam Ha Minh
 is certified Java programmer (SCJP and SCWCD). He began programming with Java back in the days of Java 1.4 and has been passionate about it ever since. You can connect with him on
Facebook and watch
his Java videos on YouTube.