Spring MVC File Upload Tutorial with Eclipse IDE
- Details
- Written by Nam Ha Minh
- Last Updated on 24 June 2019 | Print Email
This tutorial is about how to implement file upload functionality with Spring MVC framework. To handle file uploads, Spring provides a MultipartResolver bean which is responsible for resolving multipart request. This resolver is working with two file upload libraries:
- Apache Commons File Upload: The bean class is org.springframework.web.multipart.commons.CommonsMultipartResolver
- COS (com.oreilly.servlet): The bean class is org.springframework.web.multipart.cos.CosMultipartResolver
- Apache Commons File Upload: The bean class is org.springframework.web.multipart.commons.CommonsMultipartResolver
We need to declare the MultipartResolverbean in Spring’s context file as follows:
For CommonsMultipartResolver:
<bean id="multipartResolver"
	class="org.springframework.web.multipart.commons.CommonsMultipartResolver">
	<!-- max file size in bytes -->
	<property name="maxUploadSize" value="2000000" />
	<!-- other properties... -->
</bean>
And for CosMultipartResolver:
<bean id="multipartResolver"
	class="org.springframework.web.multipart.cos.CosMultipartResolver">
	<!-- max file size in bytes -->
	<property name="maxUploadSize" value="2000000" />
	<!-- other properties... -->
</bean>
Also we need to add to classpath jar files of the file upload library employed:
- For Apache Commons File Upload: commons-fileupload-VERSION.jar and commons-io-VERSION.jar (Commons File Upload depends on Commons IO).
- For COS: cos.jar
As Apache Commons File Upload is popular and preferred over COS, this tutorial will use it. We will build a Spring MVC application which has an upload form looks like in the following screenshot:

This tutorial requires the following pieces of software installed on your computer (click on a link to download the corresponding software - of course you can use newer versions):
1. Setup Eclipse project
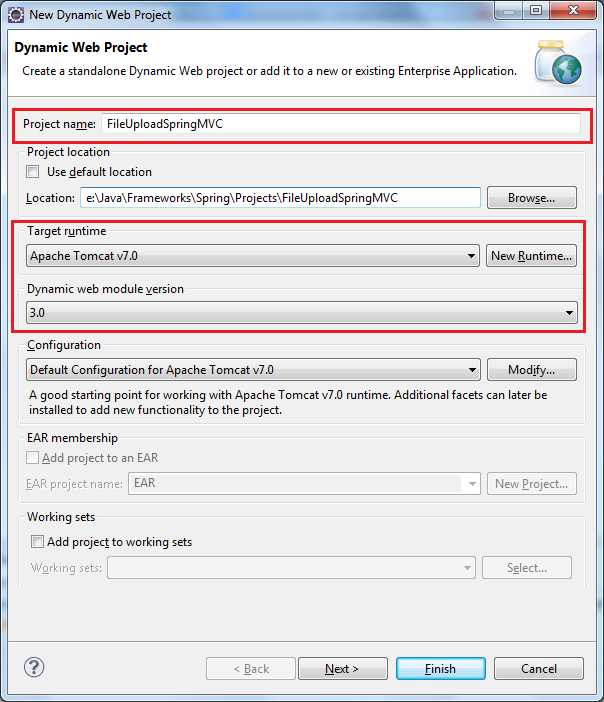
Let’s setup an Eclipse project for a Java web application. In Eclipse IDE, make sure the Java EE perspective is currently active. Select File > New > Dynamic Web Project from main menu. In the New Dynamic Web Project dialog, type the project name as FileUploadSpringMVC, and make sure Target runtime is set to Apache Tomcat v7.0 and Dynamic web module version is 3.0, as per the following screenshot:
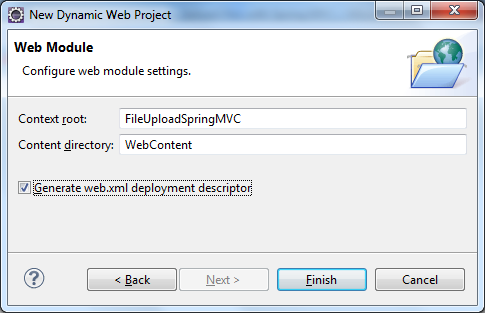
Click Next two times. On the last screen, check Generate web.xml deployment descriptor and click Finish:
Select the newly created project in Project Explorer view, then select Project > Properties from main menu (or press Alt + Enter). In the dialog Properties for FileUploadSpringMVC, make sure the Target Runtimes is set to Apache Tomcat v7.0, like in the following screenshot:
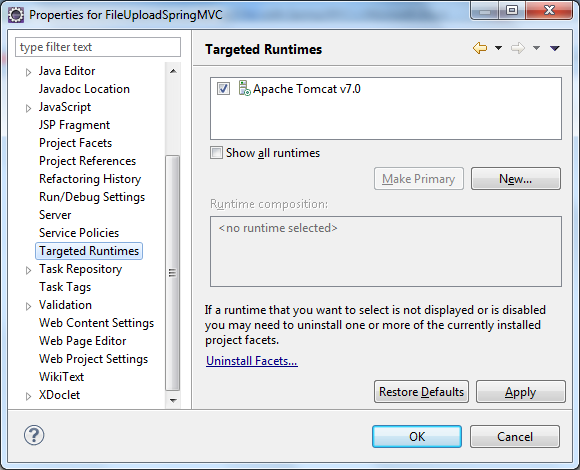
That will make jar files of Servlet API available in the project’s classpath.
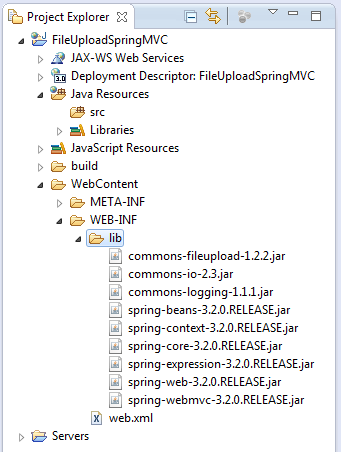
Copy the following jar files into WebContent\WEB-INF\libdirectory:
Spring framework | spring-beans-3.2.0.RELEASE.jar spring-context-3.2.0.RELEASE.jar spring-core-3.2.0.RELEASE.jar spring-expression-3.2.0.RELEASE.jar spring-web-3.2.0.RELEASE.jar spring-webmvc-3.2.0.RELEASE.jar
|
Apache Commons File Upload | commons-fileupload-1.2.2.jar |
Apache Commons IO | commons-io-2.3.jar |
Apache Commons Logging | commons-logging-1.1.1.jar |
NOTE:
- The Spring framework’s jar files above is only for Spring MVC. You may have more jar files if using other features of Spring.
- After adding the jar files, it requires to refresh the project (select the project and press F5).
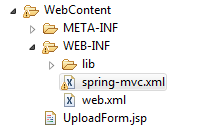
So far we have structure of the project as follows:
Now let’s create an upload form as will be described in the next section.
2. Creating upload form
Create a new JSP file called UploadForm.jspunder project’s WebContent directory, and paste the following code into the code editor:
<%@ page language="java" contentType="text/html; charset=UTF-8"
    pageEncoding="UTF-8"%>
<!DOCTYPE html PUBLIC "-//W3C//DTD HTML 4.01 Transitional//EN"
	 "http://www.w3.org/TR/html4/loose.dtd">
<html>
<head>
<meta http-equiv="Content-Type" content="text/html; charset=UTF-8">
<title>Spring MVC File Upload Demo</title>
</head>
<body>
	<center>
		<h1>Spring MVC File Upload Demo</h1>
		<form method="post" action="uploadFile.do" enctype="multipart/form-data">
			<table border="0">
				<tr>
					<td>Description:</td>
					<td><input type="text" name="description" size="50"/></td>
				</tr>
				<tr>
					<td>Pick file #1:</td>
					<td><input type="file" name="fileUpload" size="50" /></td>
				</tr>
				<tr>
					<td>Pick file #2:</td>
					<td><input type="file" name="fileUpload" size="50" /></td>
				</tr>
				<tr>
					<td colspan="2" align="center"><input type="submit" value="Upload" /></td>
				</tr>
			</table>
		</form>
	</center>
</body>
</html>
Notice the <form> tag is declared with the following attributes:
- method=”post”: indicates an HTTP POST request will be sent to the server on submitting this form.
- action=”uploadFile.do”: name of the action will handle form submission. We will configure this later in the Spring configuration section.
- enctype=”multipart/form-data”: indicates that this form may contain multipart data (file upload) so the web browser and the server know how to handle the request.
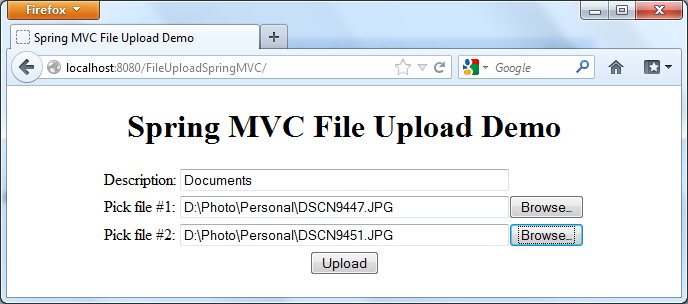
The form would look like this:
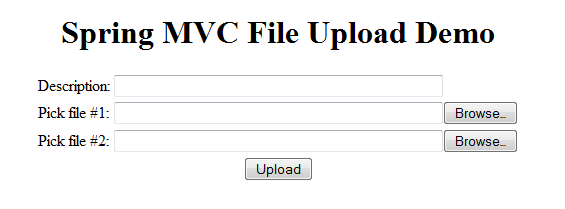
As we can see, this form contains a regular text field (Description) and two fields (Pick file #1 and Pick file #2) for browsing up to 2 files for uploading.
Next, we are going to configure how Spring resolves multipart request and enable Spring MVC for the web application.
3. Configuring Spring MVC and MultipartResolver
Create a Spring’s context configuration file under project’s WebContent\WEB-INFdirectory, called spring-mvc.xml:
Paste the following code into the editor:
<?xml version="1.0" encoding="UTF-8"?>
<beans xmlns="http://www.springframework.org/schema/beans"
	xmlns:xsi="http://www.w3.org/2001/XMLSchema-instance"
	xmlns:context="http://www.springframework.org/schema/context"
	xsi:schemaLocation="http://www.springframework.org/schema/beans
	http://www.springframework.org/schema/beans/spring-beans-3.0.xsd
	http://www.springframework.org/schema/context
	http://www.springframework.org/schema/context/spring-context-3.0.xsd">

	<context:component-scan base-package="net.codejava.spring" />

	<bean id="viewResolver"
		class="org.springframework.web.servlet.view.InternalResourceViewResolver">
		<property name="prefix" value="/" />
		<property name="suffix" value=".jsp" />
	</bean>

    <bean id="multipartResolver"
        class="org.springframework.web.multipart.commons.CommonsMultipartResolver">
        <!-- max upload size in bytes -->
        <property name="maxUploadSize" value="20971520" /> <!-- 20MB -->

        <!-- max size of file in memory (in bytes) -->
        <property name="maxInMemorySize" value="1048576" /> <!-- 1MB -->

    </bean>

	<bean
		class="org.springframework.web.servlet.handler.SimpleMappingExceptionResolver">
		<property name="exceptionMappings">
			<props>
				<prop key="java.lang.Exception">Error</prop>
			</props>
		</property>
	</bean>
</beans>
Let’s explain this configuration in deeper details:
- The <context:component-scan> element tells Spring to scan the specified package and sub packages for initializing components annotated by Spring annotations, because we will use annotations for our controller class.
- We declare the bean viewResolver for mapping between logical view names with real JSP files. This is fundamental for a Spring MVC-based project with JSP views.
- <bean id="multipartResolver".../>: this is the important part. We tell Spring to use this multipartResolver for handling multipart request, with implementation is CommonsMultipartResolver which is using Apache Commons File Upload. And we configure upload settings by specifying the following properties:
- maxUploadSize: maximum upload size for a single request. That means the total size of all upload files cannot exceed this configured maximum. Default is unlimited (value of -1). Here we set it to 20MB.
- maxInMemorySize: files with size below this value are stored in memory, otherwise they will be stored in disk directly. Default is 10KB (10240 bytes). Here it is set to 1MB.
- The bean SimpleMappingExceptionResolver maps an exception type with a JSP view. In this case, we map all exceptions of type java.lang.Exception to Error.jsp page.
Now let’s enable Spring to handle requests coming into this application. Open web.xml file and paste the following content:
<?xml version="1.0" encoding="UTF-8"?>
<web-app xmlns:xsi="http://www.w3.org/2001/XMLSchema-instance"
	xmlns="http://java.sun.com/xml/ns/javaee"
	xmlns:web="http://java.sun.com/xml/ns/javaee/web-app_2_5.xsd"
	xsi:schemaLocation="http://java.sun.com/xml/ns/javaee
		http://java.sun.com/xml/ns/javaee/web-app_3_0.xsd"
	id="WebApp_ID" version="3.0">
  <display-name>FileUploadSpringMVC</display-name>

	<servlet>
		<servlet-name>SpringController</servlet-name>
		<servlet-class>org.springframework.web.servlet.DispatcherServlet</servlet-class>
		<init-param>
			<param-name>contextConfigLocation</param-name>
			<param-value>/WEB-INF/spring-mvc.xml</param-value>
		</init-param>
		<load-on-startup>1</load-on-startup>
	</servlet>

	<servlet-mapping>
		<servlet-name>SpringController</servlet-name>
		<url-pattern>*.do</url-pattern>
	</servlet-mapping>

  <welcome-file-list>
    <welcome-file>UploadForm.jsp</welcome-file>
  </welcome-file-list>
</web-app>
We declare Spring controller servlet with its context configuration file’s location, and map this servlet for all URL patterns end with *.do.
The <welcome-file-list> section specifies that UploadForm.jsp is the default page when accessing this application.
In the next section, we will create a Spring controller class for handling multipart request from the upload form.
4. Implementing Spring controller
Right click on project’s src directory in Project Explorer view, select New > Class from the context menu.
In the New Java Class dialog, type the following information:
- Package: net.codejava.spring
- Name: FileUploadController
Click Finish to close the dialog. Paste the following into the editor of class FileUploadController:
package net.codejava.spring;

import java.io.File;

import javax.servlet.http.HttpServletRequest;

import org.springframework.stereotype.Controller;
import org.springframework.web.bind.annotation.RequestMapping;
import org.springframework.web.bind.annotation.RequestMethod;
import org.springframework.web.bind.annotation.RequestParam;
import org.springframework.web.multipart.commons.CommonsMultipartFile;

@Controller
@RequestMapping("/uploadFile.do")
public class FileUploadController {

	private String saveDirectory = "E:/Test/Upload/";

	@RequestMapping(method = RequestMethod.POST)
	public String handleFileUpload(HttpServletRequest request,
			@RequestParam CommonsMultipartFile[] fileUpload) throws Exception {

		System.out.println("description: " + request.getParameter("description"));

		if (fileUpload != null && fileUpload.length > 0) {
			for (CommonsMultipartFile aFile : fileUpload){

				System.out.println("Saving file: " + aFile.getOriginalFilename());

				if (!aFile.getOriginalFilename().equals("")) {
					aFile.transferTo(new File(saveDirectory + aFile.getOriginalFilename()));
				}
			}
		}

		// returns to the view "Result"
		return "Result";
	}
}
In this class, we use the following Spring annotations:
- @Controller: marks this class as a Spring controller.
- @RequestMapping:
- One is preceding the class to specify the action name (“/uploadFile.do”) which is handled by this controller. Note that this action name must match with one specified in the upload form.
- Another is preceding the method handleFileUpload() to indicate this method will handle POST request only.
- @RequestParam: this annotation is used as a parameter of the method handleFileUpload() to map a form field with a backing object. Here we map a field named “fileUpload” in the upload form to a CommonsMultipartFile object. The MultipartResolver will convert multipart data into this object. Thus we can access file upload data via CommonsMultipartFile object .We use an array of CommonsMultipartFile objects in order to handle multiple upload files.
In the handleFileUpload() method, we print out value of the Description field, then iterate over the array of CommonsMultipartFile objects and call the transferTo(File) method on each to permanently save the upload file into a specific file on the server.
Finally the controller returns a logical view name “Result” which will be mapped to Result.jsp page which we will create in the next section.
5. Creating result page and error page
Under project’s WebContent directory, create two JSP files: Result.jsp and Error.jsp:
Code of Result.jsp file:
<%@ page language="java" contentType="text/html; charset=UTF-8"
pageEncoding="UTF-8"%>
<!DOCTYPE html PUBLIC "-//W3C//DTD HTML 4.01 Transitional//EN"
"http://www.w3.org/TR/html4/loose.dtd">
<html>
<head>
<meta http-equiv="Content-Type" content="text/html; charset=UTF-8">
<title>File Upload Result</title>
</head>
<body>
<center>
<h2>The file(s) was uploaded successfully!</h2>
</center>
</body>
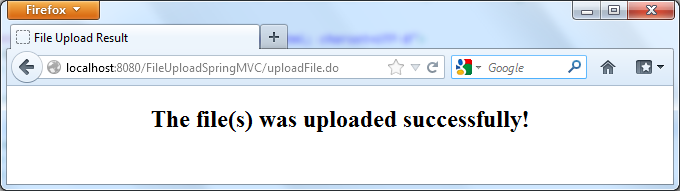
</html>This page simply displays a message when the upload was successful.
Code of Error.jsp file:
<%@ page language="java" contentType="text/html; charset=UTF-8"
    pageEncoding="UTF-8"%>
<!DOCTYPE html PUBLIC "-//W3C//DTD HTML 4.01 Transitional//EN"
	"http://www.w3.org/TR/html4/loose.dtd">
<html>
<head>
<meta http-equiv="Content-Type" content="text/html; charset=UTF-8">
<title>Error</title>
</head>
<body>
	<center>
		<h2>Sorry, there was an error occurred:</h3>
		<h3>${exception.message}</h2>
	</center>
</body>
</html>
This error page displays error message of the thrown exception.
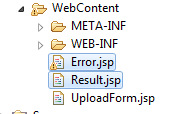
So far we created all the parts, finally the project’s structure looks like follows:

6. Deploying and testing the application
Now let’s deploy the application on Tomcat server in Eclipse. Switch to Servers view (Window > Show View > Servers), click on the link new server wizard:

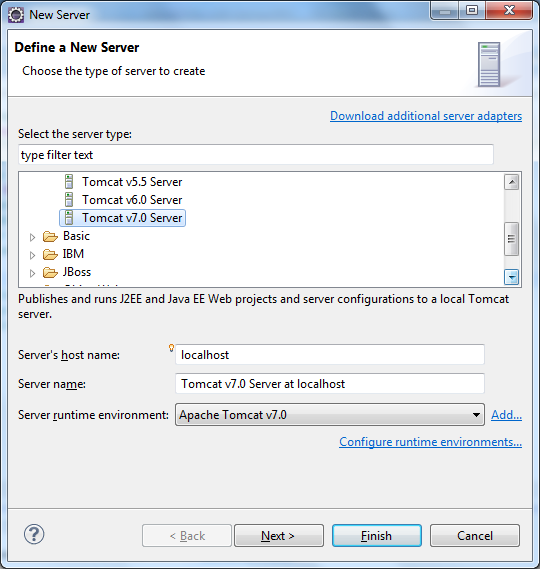
In the New Server view, select Tomcat v7.0 Server and click Next:
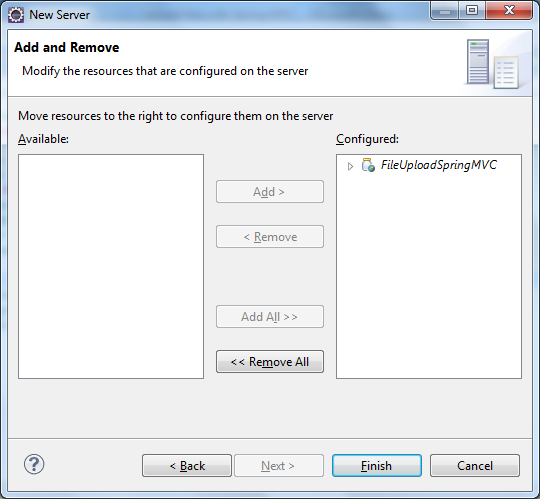
On the next screen, move FileUploadSpringMVC project from the left column to the right one, then click Finish:
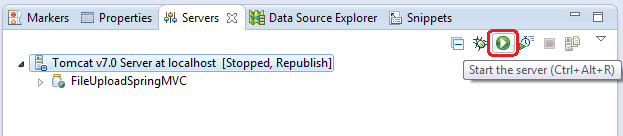
Tomcat is now added to the Servers view and it hosts the FileUploadSpringMVC application. To start the server, click on the button Start the server:
After the server is started, type the following URL into browser’s address bar (port number may be different, depending on configuration):
http://localhost:8080/FileUploadSpringMVC/
The upload form is displayed, type something into the Description field and pick up two arbitrary files, then hit Upload:
We will see the following result page after the files were uploaded successfully:
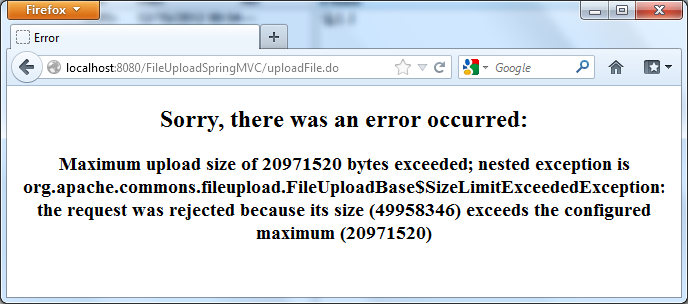
If we pick up a file which is larger than the configured max upload size, the error page will be displayed instead:
And that’s we have finished our file upload application based on Spring MVC framework. We also have ready-to-download Eclipse project and a ready-to-deploy WAR file of the application which can be found in the attachment section.
Related File Upload Tutorials:
- Apache Commons FileUpload Example with Servlet and JSP
- Java File Upload Example with Servlet 3.0 API
- Upload Files to Database with Spring MVC and Hibernate
Other Spring Tutorials:
- Understand the core of Spring framework
- Understand Spring MVC
- Understand Spring AOP
- Spring Dependency Injection Example (Annotations)
- Spring MVC beginner tutorial with Spring Tool Suite IDE
- Spring MVC Form Handling Tutorial
- Spring MVC Form Validation Tutorial
- 14 Tips for Writing Spring MVC Controller
- Spring Web MVC Security Basic Example (XML Configuration)
- Understand Spring Data JPA with Simple Example
About the Author:
 Nam Ha Minh is certified Java programmer (SCJP and SCWCD). He began programming with Java back in the days of Java 1.4 and has been passionate about it ever since. You can connect with him on Facebook and watch his Java videos on YouTube.
| [Deployable WAR file] | 3540 kB | |
| [Eclipse project] | 3542 kB |