How to upload files to database with Servlet, JSP and MySQL
- Details
- Written by Nam Ha Minh
- Last Updated on 02 July 2019 | Print Email
- Servlet 3.0+: Since Servlet 3.0 we can write code to handle file upload easily. For details, read this tutorial: Java file upload with servlet. The code is working with latest version of Servlet API (Servlet 4.0 or 4.1)
- MySQL database 5.5 or later: We will store uploaded files in MySQL database. For more details about how to store files in MySQL database, read this article.
- Upload.jsp: presents a form which allows users entering some information (first name and last name), and picking up a file (a portrait image).
- FileUploadDBServlet: captures input from the upload form, saves the upload file into database, and forwards the users to a message page.
- Message.jsp: shows either successful or error message.
1. Creating MySQL database table
First, let’s create a database and a table in MySQL. Execute the following script using either MySQL Command Line Client or MySQL Workbench:create database AppDB; use AppDB; CREATE TABLE `contacts` ( `contact_id` int(11) NOT NULL AUTO_INCREMENT, `first_name` varchar(45) DEFAULT NULL, `last_name` varchar(45) DEFAULT NULL, `photo` mediumblob, PRIMARY KEY (`contact_id`) ) ENGINE=InnoDB DEFAULT CHARSET=latin1The script will create a database named AppDB and a table named contacts. File will be stored in the column photo which is of type mediumblob which can store up to 16 MB of binary data. For larger files, use longblob (up to 4 GB).
2. Coding upload form page
<%@ page language="java" contentType="text/html; charset=ISO-8859-1"
	pageEncoding="ISO-8859-1"%>
<!DOCTYPE html PUBLIC "-//W3C//DTD HTML 4.01 Transitional//EN"
	"http://www.w3.org/TR/html4/loose.dtd">
<html>
<head>
<meta http-equiv="Content-Type" content="text/html; charset=ISO-8859-1">
<title>File Upload to Database Demo</title>
</head>
<body>
	<center>
		<h1>File Upload to Database Demo</h1>
		<form method="post" action="uploadServlet" enctype="multipart/form-data">
			<table border="0">
				<tr>
					<td>First Name: </td>
					<td><input type="text" name="firstName" size="50"/></td>
				</tr>
				<tr>
					<td>Last Name: </td>
					<td><input type="text" name="lastName" size="50"/></td>
				</tr>
				<tr>
					<td>Portrait Photo: </td>
					<td><input type="file" name="photo" size="50"/></td>
				</tr>
				<tr>
					<td colspan="2">
						<input type="submit" value="Save">
					</td>
				</tr>
			</table>
		</form>
	</center>
</body>
</html>
This page shows two text fields (first name and last name) and a file field which allows the users choosing a file to upload. The action attribute of this form is set to uploadServlet which is URL mapping of the servlet we will create in the next section.
3. Coding file upload servlet
Create a servlet class named FileUploadDBServlet.java with the following code:package net.codejava.upload;
import java.io.IOException;
import java.io.InputStream;
import java.sql.Connection;
import java.sql.DriverManager;
import java.sql.PreparedStatement;
import java.sql.SQLException;
import javax.servlet.ServletException;
import javax.servlet.annotation.MultipartConfig;
import javax.servlet.annotation.WebServlet;
import javax.servlet.http.HttpServlet;
import javax.servlet.http.HttpServletRequest;
import javax.servlet.http.HttpServletResponse;
import javax.servlet.http.Part;
@WebServlet("/uploadServlet")
@MultipartConfig(maxFileSize = 16177215) // upload file's size up to 16MB
public class FileUploadDBServlet extends HttpServlet {
// database connection settings
private String dbURL = "jdbc:mysql://localhost:3306/AppDB";
private String dbUser = "root";
private String dbPass = "secret";
protected void doPost(HttpServletRequest request,
HttpServletResponse response) throws ServletException, IOException {
// gets values of text fields
String firstName = request.getParameter("firstName");
String lastName = request.getParameter("lastName");
InputStream inputStream = null; // input stream of the upload file
// obtains the upload file part in this multipart request
Part filePart = request.getPart("photo");
if (filePart != null) {
// prints out some information for debugging
System.out.println(filePart.getName());
System.out.println(filePart.getSize());
System.out.println(filePart.getContentType());
// obtains input stream of the upload file
inputStream = filePart.getInputStream();
}
Connection conn = null; // connection to the database
String message = null; // message will be sent back to client
try {
// connects to the database
DriverManager.registerDriver(new com.mysql.jdbc.Driver());
conn = DriverManager.getConnection(dbURL, dbUser, dbPass);
// constructs SQL statement
String sql = "INSERT INTO contacts (first_name, last_name, photo) values (?, ?, ?)";
PreparedStatement statement = conn.prepareStatement(sql);
statement.setString(1, firstName);
statement.setString(2, lastName);
if (inputStream != null) {
// fetches input stream of the upload file for the blob column
statement.setBlob(3, inputStream);
}
// sends the statement to the database server
int row = statement.executeUpdate();
if (row > 0) {
message = "File uploaded and saved into database";
}
} catch (SQLException ex) {
message = "ERROR: " + ex.getMessage();
ex.printStackTrace();
} finally {
if (conn != null) {
// closes the database connection
try {
conn.close();
} catch (SQLException ex) {
ex.printStackTrace();
}
}
// sets the message in request scope
request.setAttribute("Message", message);
// forwards to the message page
getServletContext().getRequestDispatcher("/Message.jsp").forward(request, response);
}
}
} In this servlet, we use two annotations:- @WebServlet: marks this servlet so that the servlet container will load it at startup, and map it to the URL pattern /uploadServlet.
- @MultipartConfig: indicates this servlet will handle multipart request. We restrict maximum size of the upload file up to 16 MB.
- Obtaining the part of upload file in the request:
Part filePart = request.getPart("photo");The name “photo” is name of the file input field in the Upload.jsp page. - Obtaining input stream of the upload file:
inputStream = filePart.getInputStream();
- And pass the input stream into the prepared statement:
statement.setBlob(3, inputStream);If you want to master Java Servlet and JSP programming, I recommend you to read this excellent Head First Servlet and JSP book.
4. Coding message page
Create a JSP page named as Message.jsp with the following code:<%@ page language="java" contentType="text/html; charset=ISO-8859-1"
pageEncoding="ISO-8859-1"%>
<!DOCTYPE html PUBLIC "-//W3C//DTD HTML 4.01 Transitional//EN"
"http://www.w3.org/TR/html4/loose.dtd">
<html>
<head>
<meta http-equiv="Content-Type" content="text/html; charset=ISO-8859-1">
<title>Message</title>
</head>
<body>
<center>
<h3><%=request.getAttribute("Message")%></h3>
</center>
</body>
</html>This page simply displays value of the variable “Message” in the request scope. 5. Testing the application and verifying file stored in database
Supposing the application is deployed on localhost at port 8080, under the context root /FileUploadDatabase, type the following URL:http://localhost:8080/FileUploadDatabase/Upload.jsp
The following upload form is displayed: Type first name, last name, and pick up an image file. Click Save button, if everything is going well, this message appears:
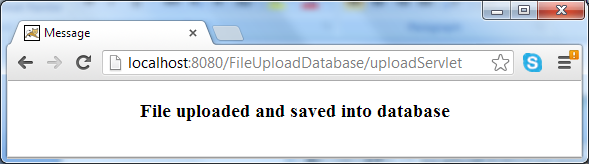 To verify that the file is stored successfully in the database, open a new SQL Editor in MySQL Workbench and execute the following query:
select * from contacts;The query would return the newly inserted record, right click on the BLOB cell of the column photo, and select Open Value in Editor from the context menu:
 A dialog appears and we can see the image in the Image tab:
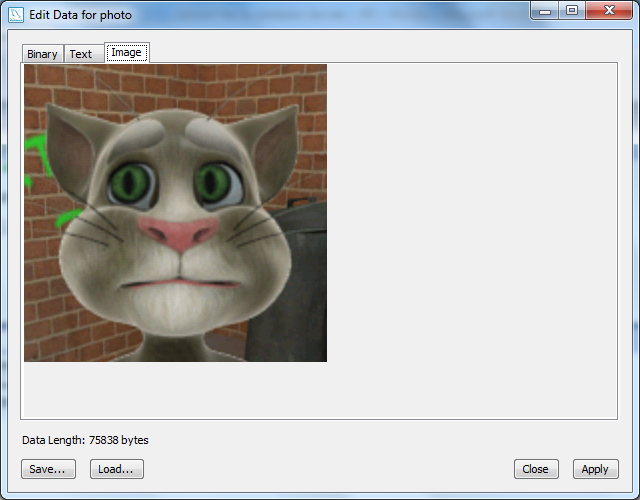 If you want to retrieve the file stored in database programmatically, read the tutorial: How to retrieve file data from database.NOTE: By default, MySQL restricts the size of data packet can be sent in a query to only 1 MB. So you may get an error if trying to upload a file bigger than this limit. To increase this size limit, set the max_allowed_packet variable in MySQL, as discussed in this tutorial.To learn a complete e-commerce website development with Java, I recommend you to take this Build an e-commerce website with Java course.
 Related Tutorials:
- How to upload files with Java Servlet
- How to store files in database with JDBC
- Java Servlet, JSP and JDBC CRUD Tutorial
Other Java Coding Tutorials:
- 10 Common Mistakes Every Beginner Java Programmer Makes
- 10 Java Core Best Practices Every Java Programmer Should Know
- How to become a good programmer? 13 tasks you should practice now
- How to calculate MD5 and SHA hash values in Java
- How to generate random numbers in Java
- Java File Encryption and Decryption Example
About the Author:
 Nam Ha Minh is certified Java programmer (SCJP and SCWCD). He began programming with Java back in the days of Java 1.4 and has been passionate about it ever since. You can connect with him on Facebook and watch his Java videos on YouTube.
| [Eclipse project] | 676 kB |