How to use log4j in Spring MVC
- Details
- Written by Nam Ha Minh
- Last Updated on 20 June 2019 | Print Email
This tutorial guides you how to setup logging utility log4j for a Spring MVC applicaiton.
You know, Log4j is a popular and widely-used logging framework for Java development. It’s pretty easy to setup and use log4j in a Spring MVC application, just by following a few steps described below.
1. Adding log4j library jar file
First, download log4j distribution, extract the zip archive and add the log4j-1.2.17.jar file into the WEB-INF\lib directory of your Spring MVC web application.
If you are using Maven, add the following entry into pom.xml file:
<dependency>
  <groupId>log4j</groupId>
  <artifactId>log4j</artifactId>
  <version>1.2.17</version>
  <scope>runtime</scope>
</dependency>
2. Creating log4j configuration file
Create a log4j.properties file with the following content:
# LOG4J configuration
log4j.rootLogger=INFO, Appender1, Appender2

log4j.appender.Appender1=org.apache.log4j.ConsoleAppender
log4j.appender.Appender1.layout=org.apache.log4j.PatternLayout
log4j.appender.Appender1.layout.ConversionPattern=%-7p %d [%t] %c %x - %m%n

log4j.appender.Appender2=org.apache.log4j.FileAppender
log4j.appender.Appender2.File=D:/Logs/SpringMVC.log
log4j.appender.Appender2.layout=org.apache.log4j.PatternLayout
log4j.appender.Appender2.layout.ConversionPattern=%-7p %d [%t] %c %x - %m%n
That specifies log level as INFO and configures two appenders: one for console logging and one for file logging (Path of the log file is D:/Logs/SpringMVC.log, so make sure the directory exists). If you prefer XML, here’s the equivalent version in XML (log4j.xml):
<?xml version="1.0" encoding="UTF-8"?>
<!DOCTYPE log4j:configuration PUBLIC "-//log4j/log4j Configuration//EN" "log4j.dtd">

<log4j:configuration xmlns:log4j="http://jakarta.apache.org/log4j/">

    <appender name="Appender1" class="org.apache.log4j.ConsoleAppender">
       <layout class="org.apache.log4j.PatternLayout">
          <param name="ConversionPattern" value="%-7p %d [%t] %c %x - %m%n"/>
       </layout>
    </appender>

    <appender name="Appender2" class="org.apache.log4j.FileAppender">
       <param name="File" value="D:/Logs/SpringMVC2.log" />
       <layout class="org.apache.log4j.PatternLayout">
          <param name="ConversionPattern" value="%-7p %d [%t] %c %x - %m%n"/>
       </layout>
    </appender>

    <root>
        <priority value="INFO"/>
        <appender-ref ref="Appender1" />
        <appender-ref ref="Appender2" />
    </root>

</log4j:configuration>
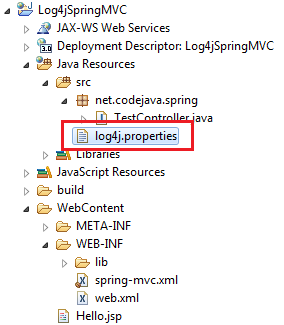
Then put the log4j.properties file or log4j.xml file under the root of the classpath (under WEB-INF\classes directory of your web application). In Eclipse, put it under src directory like in the following screenshot:

And that’s all! Now we can write some code in a Spring controller class to use log4j as follows:
package net.codejava.spring;

import org.apache.log4j.Logger;
import org.springframework.stereotype.Controller;
import org.springframework.web.bind.annotation.RequestMapping;
import org.springframework.web.bind.annotation.RequestMethod;
import org.springframework.web.servlet.ModelAndView;

@Controller
public class TestController {

	private Logger logger = Logger.getLogger(TestController.class);

	@RequestMapping(value = "/test", method = RequestMethod.GET)
	public ModelAndView test() {
		ModelAndView model = new ModelAndView("Hello");

		logger.info("This is an info log entry");
		logger.error("This is an error log entry");

		return model;
	}
}
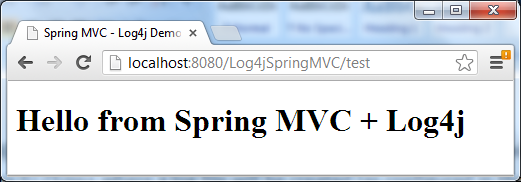
Now let’s test it out. For the demo application in this tutorial, type the following URL into browser’s address bar:
http://localhost:8080/Log4jSpringMVC/test
Output in the browser:

And notice some log entries are appended to the server’s console as follows:
![]()
And the log entries are also written to the log in the D:/Logs/SpringMVC.log file file.
Related Log4j Tutorials:
- How to use log4j in Java
- Configure log4j for creating daily rolling log files
- Common conversion patterns for log4j's PatternLayout
Other Spring Tutorials:
- Understand the core of Spring framework
- Understand Spring MVC
- Spring MVC Form Handling Tutorial
- Spring MVC Form Validation Tutorial
- Spring MVC with JdbcTemplate Example
- Spring MVC + Spring Data JPA + Hibernate - CRUD Example
- 14 Tips for Writing Spring MVC Controller
- Spring and Hibernate Integration Tutorial Part (XML Configuration)
About the Author:
 Nam Ha Minh is certified Java programmer (SCJP and SCWCD). He began programming with Java back in the days of Java 1.4 and has been passionate about it ever since. You can connect with him on Facebook and watch his Java videos on YouTube.
Comments