Java File Upload Example with Servlet 3.0 API
- Details
- Written by Nam Ha Minh
- Last Updated on 27 June 2019 | Print Email
Before Java EE 6, applications usually have to use an external library like Apache’s Common File Upload to handle file upload functionality. Fortunately, developers do no longer have to depend on any external library, since Java EE 6 provides built-in file upload API.
Runtime requirement:
- Java EE 6 with Servlet 3.0.
- Server: Apache Tomcat 7.0
Of course you can use newer versions of Java EE and Tomcat server.
1. File Upload API in Servlet 3.0
The Servlet 3.0 API provides some new APIs for working with upload data:
- Annotation @MultipartConfig: A servlet can be annotated with this annotation in order to handle multipart/form-data requests which contain file upload data. The MultipartConfig annotation has the following options:
- fileSizeThreshold: file’s size that is greater than this threshold will be directly written to disk, instead of saving in memory.
- location: directory where file will be stored via Part.write() method.
- maxFileSize: maximum size for a single upload file.
- maxRequestSize:maximum size for a request.
All sizes are measured in bytes.
- InterfacePart: represents a part in a multipart/form-data request. This interface defines some methods for working with upload data (to name a few):
- getInputStream(): returns an InputStream object which can be used to read content of the part.
- getSize(): returns the size of upload data, in bytes.
- write(String filename): this is the convenience method to save upload data to file on disk. The file is created relative to the location specified in the MultipartConfig annotation.
- New methods introduced in HttpServletRequest interface:
- getParts(): returns a collection of Part objects
- getPart(String name): retrieves an individual Part object with a given name.
- Annotation @MultipartConfig: A servlet can be annotated with this annotation in order to handle multipart/form-data requests which contain file upload data. The MultipartConfig annotation has the following options:
These new APIs make our life easier, really! The code to save upload file is very simple, as follows:
        for (Part part : request.getParts()) {
            String fileName = extractFileName(part);
            part.write(fileName);
        }
The above code simply iterates over all parts of the request, and save each part to disk using the write() method. The file name is extracted in the following method:
    private String extractFileName(Part part) {
        String contentDisp = part.getHeader("content-disposition");
        String[] items = contentDisp.split(";");
        for (String s : items) {
            if (s.trim().startsWith("filename")) {
                return s.substring(s.indexOf("=") + 2, s.length()-1);
            }
        }
        return "";
    }
Because file name of the upload file is included in content-disposition header like this:
form-data; name="dataFile"; filename="PHOTO.JPG"
So the extractFileName() method gets PHOTO.JPG out of the string.
Now let’s apply the new Servlet 3.0’s API to build a sample file upload web application.
2. Coding file upload servlet class
Following is source code of the servlet class (UploadServlet.java):
package net.codejava.servlet;
import java.io.File;
import java.io.IOException;
import javax.servlet.ServletException;
import javax.servlet.annotation.MultipartConfig;
import javax.servlet.annotation.WebServlet;
import javax.servlet.http.HttpServlet;
import javax.servlet.http.HttpServletRequest;
import javax.servlet.http.HttpServletResponse;
import javax.servlet.http.Part;
@WebServlet("/UploadServlet")
@MultipartConfig(fileSizeThreshold=1024*1024*2,	// 2MB
				 maxFileSize=1024*1024*10,		// 10MB
				 maxRequestSize=1024*1024*50)	// 50MB
public class UploadServlet extends HttpServlet {
	/**
	 * Name of the directory where uploaded files will be saved, relative to
	 * the web application directory.
	 */
	private static final String SAVE_DIR = "uploadFiles";

	/**
	 * handles file upload
	 */
	protected void doPost(HttpServletRequest request,
			HttpServletResponse response) throws ServletException, IOException {
		// gets absolute path of the web application
		String appPath = request.getServletContext().getRealPath("");
		// constructs path of the directory to save uploaded file
		String savePath = appPath + File.separator + SAVE_DIR;

		// creates the save directory if it does not exists
		File fileSaveDir = new File(savePath);
		if (!fileSaveDir.exists()) {
			fileSaveDir.mkdir();
		}

		for (Part part : request.getParts()) {
			String fileName = extractFileName(part);
			// refines the fileName in case it is an absolute path
			fileName = new File(fileName).getName();
			part.write(savePath + File.separator + fileName);
		}
		request.setAttribute("message", "Upload has been done successfully!");
		getServletContext().getRequestDispatcher("/message.jsp").forward(
				request, response);
	}
	/**
	 * Extracts file name from HTTP header content-disposition
	 */
	private String extractFileName(Part part) {
		String contentDisp = part.getHeader("content-disposition");
		String[] items = contentDisp.split(";");
		for (String s : items) {
			if (s.trim().startsWith("filename")) {
				return s.substring(s.indexOf("=") + 2, s.length()-1);
			}
		}
		return "";
	}
}
Note that in the servlet’s doPost() method, we save the uploaded file in a directory named “uploadFiles” which is relative to the web application directory. If this directory does not exist, it will be created.
3. Coding JSP upload form
Following is source code the upload.jspfile:
<%@ page language="java" contentType="text/html; charset=ISO-8859-1"
	pageEncoding="ISO-8859-1"%>
<!DOCTYPE html PUBLIC "-//W3C//DTD HTML 4.01 Transitional//EN"
	"http://www.w3.org/TR/html4/loose.dtd">
<html>
<head>
<meta http-equiv="Content-Type" content="text/html; charset=ISO-8859-1">
<title>File Upload</title>
</head>
<body>
<center>
	<h1>File Upload</h1>
	<form method="post" action="UploadServlet"
		enctype="multipart/form-data">
		Select file to upload: <input type="file" name="file" size="60" /><br />
		<br /> <input type="submit" value="Upload" />
	</form>
</center>
</body>
</html>
4. Coding JSP upload result page
Following is source code the result page (message.jsp):
<%@ page language="java" contentType="text/html; charset=ISO-8859-1"
	pageEncoding="ISO-8859-1"%>
<!DOCTYPE html PUBLIC "-//W3C//DTD HTML 4.01 Transitional//EN"
	"http://www.w3.org/TR/html4/loose.dtd">
<html>
<head>
<meta http-equiv="Content-Type" content="text/html; charset=ISO-8859-1">
<title>Upload</title>
</head>
<body>
	<h2>${requestScope.message}</h2>
</body>
</html>
NOTE: There is no web.xml configuration file because from Servlet 3.0, web.xml becomes optional.
5. Deploying and testing the application
Deploy the UploadServlet30.war file on a Tomcat version that supports Servlet 3.0 API (e.g. Tomcat 7.0). Type the following URL into browser’s address bar:
http://localhost:8080/UploadServlet30/upload.jsp
The upload form appears:
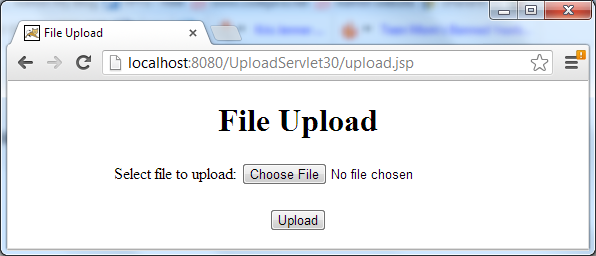
Click on Choose File button (Chrome) or Browse (FireFox/IE) to pick up a file, and hit Upload. After the file is uploaded to the server, a successful message appears:
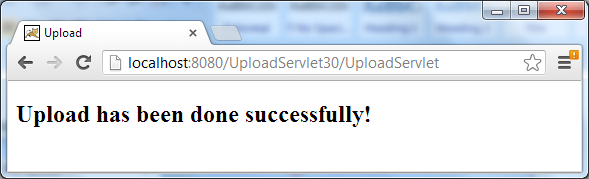
The file is stored under:
$TOMCAT_HOME\webapps\UploadServlet30\uploadFiles
You can download an Eclipse project or a deployable WAR file in the attachment section.
In addition, you can watch the following video tutorial to see how to use, deploy and test the project in action:
Related Java File Upload Tutorials:
- Java Multiple Files Upload Example
- Java File Upload Example with Servlet, JSP and Apache Commons FileUpload
- Spring MVC File Upload Tutorial with Eclipse IDE
- Upload file with Struts
- Upload files to database (Servlet + JSP + MySQL)
- Upload Files to Database with Spring MVC and Hibernate
Other Java Servlet Tutorials:
- Java Servlet Quick Start for beginners (XML)
- Java Servlet for beginners (annotations)
- Handling HTML form data with Java Servlet
- Java File Download Servlet Example
About the Author:
 Nam Ha Minh is certified Java programmer (SCJP and SCWCD). He began programming with Java back in the days of Java 1.4 and has been passionate about it ever since. You can connect with him on Facebook and watch his Java videos on YouTube.
| [Deployable WAR file] | 3 kB | |
| [Eclipse project] | 11 kB |