How to Use Postman for Testing REST APIs (Test CRUD Operations)
- Details
- Written by Nam Ha Minh
- Last Updated on 05 November 2023 | Print Email
Why REST APIs Testing with Postman
Understand Key Concepts in Postman
Use Postman to Test Retrieval REST APIs
Use Postman to Test Create REST APIs
Use Postman to Test Update REST APIs
Use Postman to Test Delete REST APIs
1. Why REST APIs Testing with Postman
In REST APIs development, you can use curl for testing your APIs, but it is very limited due to command line environment. Whereas Postman is available on the web and desktop with intuitive and easy-to-use UI. Using Postman, you can easily make API calls, modify all details of a request (parameters, body, headers, authorization…) and examine all details of a response (body, headers, cookies, pretty JSON, …). You can also save API calls for later use, and even share them with other people.Having said that, Postman making APIs testing much easier, more convenient and more intuitive than curl. In my daily working, I use both curl and Postman (curl for quick and simple testing and Postman for more advanced testing).
2. How to Get Postman App
You can use Postman on the web or Postman on desktop. Both having very similar user interfaces but you can’t test APIs on localhost with the web app. That means you have to download and install the Postman app for desktop, which is free for collaboration up to 3 users.Note that you have to create a Postman account in order to use Postman. You can also sign up with your Google account. And the web and desktop apps are synced in realtime so you can move between them seamlessly.
3. Understand Key Concepts in Postman
For testing REST APIs in Postman, you need to know three main concepts: workspaces, collections and requests.- Workspaces: help you organize your API work and collaborate with other users. Postman defines 3 types of workspaces: personal, team and public. The default one when you get started with Postman is personal workspace.
- Collections: in a workspace, you organize a group of related API requests in a collection. You can apply configurations which are common to all requests in a collection.
- Requests: a request is a test for an API end point. You create and send requests to test REST APIs.
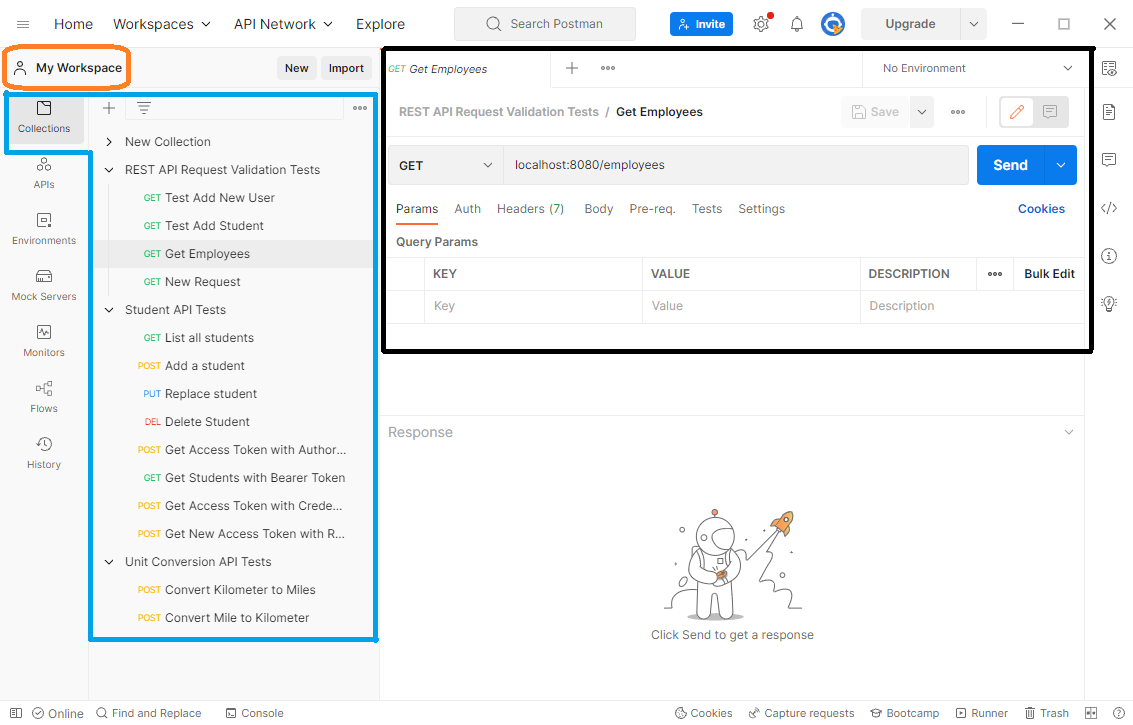 Let create a new workspace (personal) and create a collection.
4. Use Postman to Test Retrieval REST APIs
Suppose that you want to test an API for getting information about employees (retrieval API) on localhost with the end point path localhost:8080/employees, add a new request to the current collection with:- Name: Test List Employees API
- HTTP method: GET (default)
- Request URL: localhost:8080/employees
Click Send button to make call to the server. You’ll see the response sent from the server looks like as follows: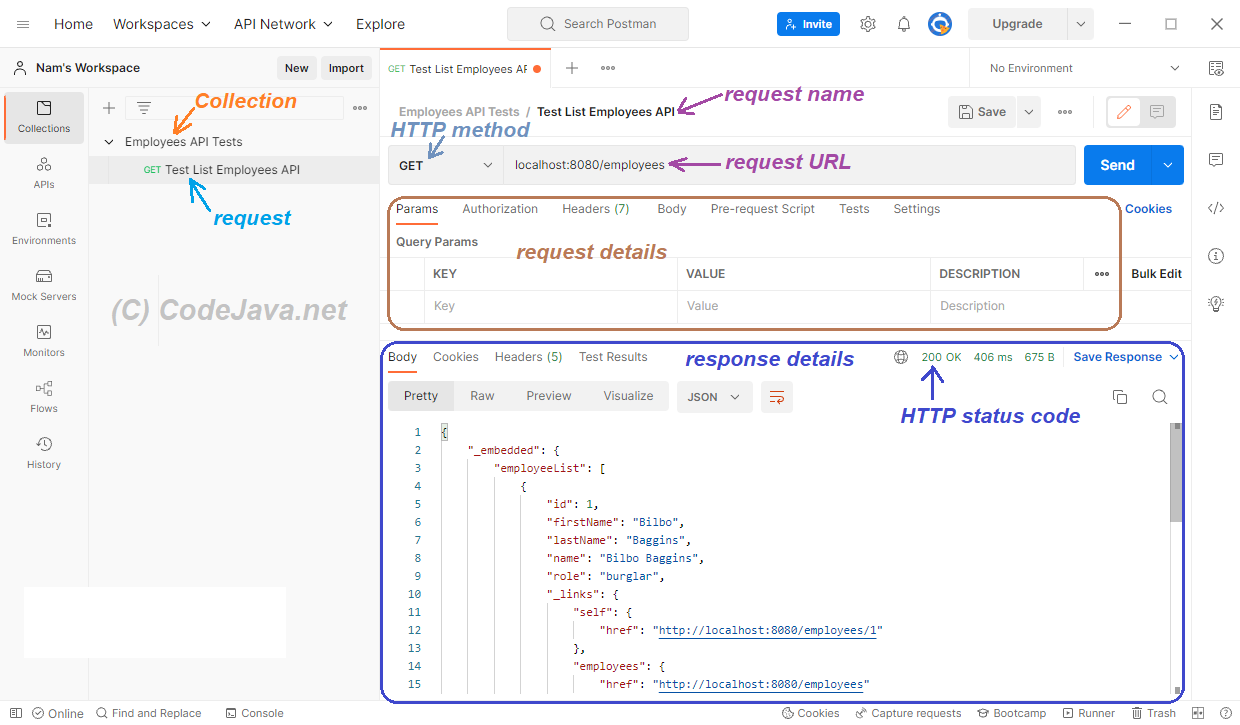 As you can see, it formats JSON document of the request’s body so you can read it easily. And you can also explore various details of response visually - very convenient. For the request, you can modify parameters, authorization, headers, body… easily. That makes API testing with Postman a breeze.
Spring Boot REST APIs Ultimate Course
Hands-on REST API Development with Spring Boot: Design, Implement, Document, Secure, Test, Consume RESTful APIs.
5. Use Postman to Test Create REST APIs
Suppose that you want to test a creation API for adding a new employee on localhost with the end point path localhost:8080/employees, add a new request to the current collection with:- Name: Test Add Employee API
- HTTP method: POST
- Request URL: localhost:8080/employees
And you need to specify employee information in the body of the request. Click Body (1), then click raw (2), choose JSON (3) and enter employee information in JSON format (4) - as shown below: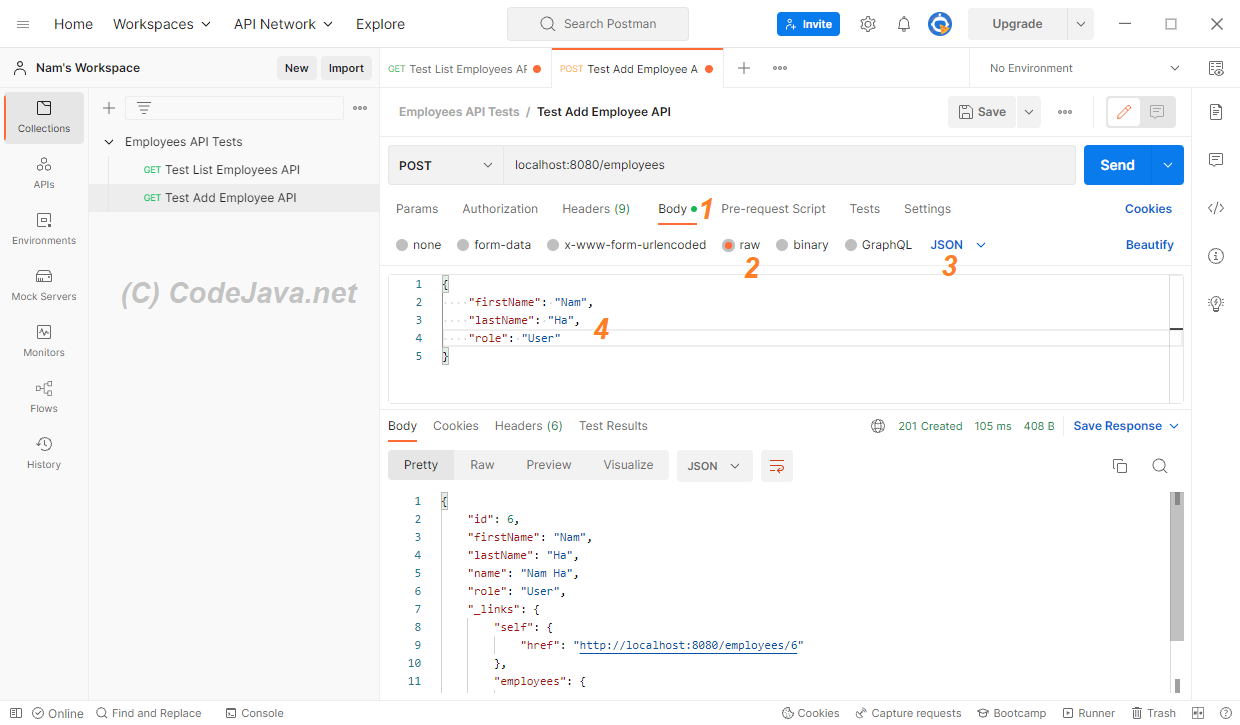 Then click Send button to make API call to the server. For create API, you it will return HTTP status code 201 Created for successful creation, with the body is a JSON document represents the newly added item.So the important point for testing create API is specifying the JSON data in the body of the request.
6. Use Postman to Test Update REST APIs
Suppose you want to test a REST API for updating information of a specify employee on localhost with the end point path localhost:8080/employees/{id}, add a new request to the current collection with:- Name: Test Update Employee API
- HTTP method: PUT
- Request URL: localhost:8080/employees/6 (update the employee with ID 6)
For update API, you need to specify details of the object that needs to be updated in the request body. Click Body (1), then click raw (2), choose JSON (3) and enter employee information in JSON format (4) - as shown below: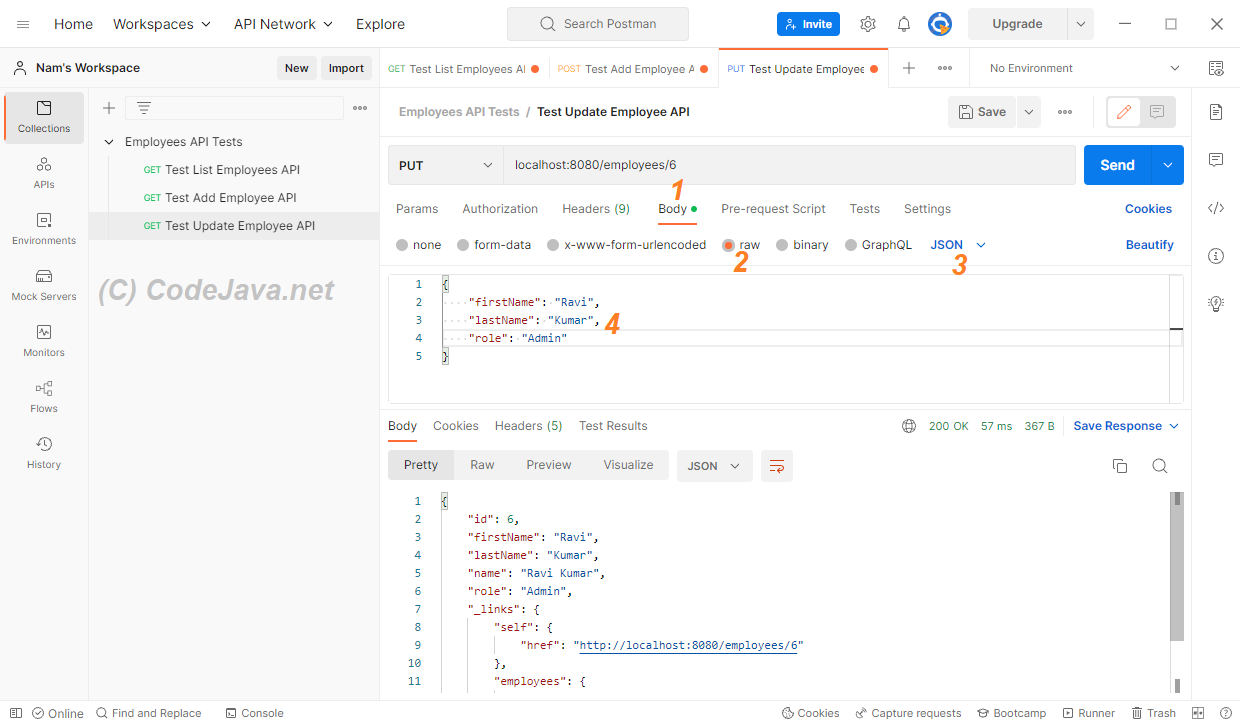 And click Send button to make API call to the server. If successful, it will return HTTP status code 200 OK with body of the response is a JSON document represents the recently updated object.NOTE: for partial update API, you may need to specify the HTTP method is PATCH. The example above is for full update API.
7. Use Postman to Test Delete REST APIs
Suppose that you want to test a REST API for deleting a specific user identified by ID with the end point path localhost:8080/employees/{id}, add a new request to the current location with:- Name: Test Delete Employee API
- HTTP method: DELETE
- Request URL: localhost:8080/employees/6 (delete the employee with ID 6)
For delete API, you don’t have to specify data in the request body. So just click Send button: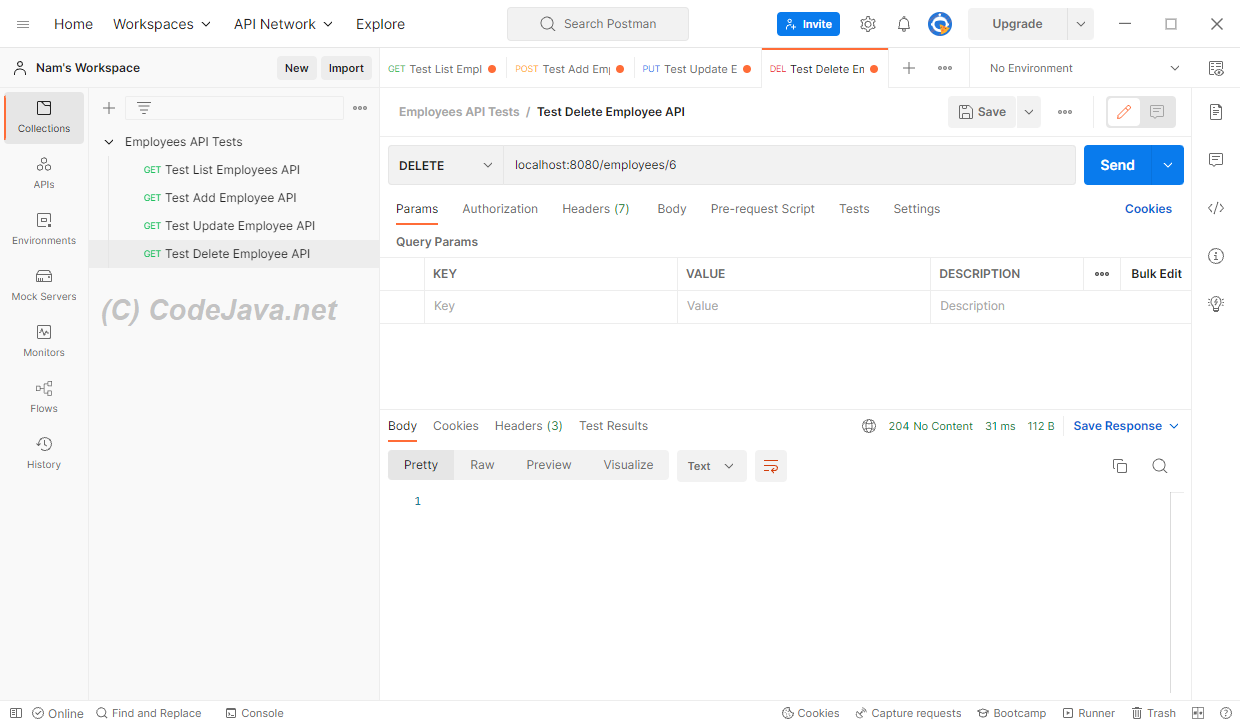 The server will return HTTP status code 204 No Content for successful delete operation with empty body.So that’s my guide about how to use Postman for testing REST APIs. You have learned how to test CRUD (Create, Retrieve, Update and Delete) APIs. And I hope you find this article helpful as an introductory guide for API testing using Postman. I recommend you watch the following video to see API Testings with Postman in action:
 Related REST API Tutorials:
- How to Use curl for Testing REST APIs (Test CRUD Operations)
- REST API Best Practices: How to Use the Right HTTP Methods and Status Codes
- Java RESTful Web Services Tutorial for Beginner with Jersey and Tomcat
- Java CRUD RESTful Web Services Examples with Jersey and Tomcat
- Spring Boot Hello World RESTful Web Services Tutorial
- Spring Boot RESTful CRUD API Examples with MySQL database
- Spring Boot File Download and Upload REST API Examples
- Spring Boot REST API CRUD with HATEOAS Tutorial
- Spring Boot REST API Request Validation Examples
Recommended Course:
About the Author:
 Nam Ha Minh is certified Java programmer (SCJP and SCWCD). He began programming with Java back in the days of Java 1.4 and has been passionate about it ever since. You can connect with him on Facebook and watch his Java videos on YouTube.