Eclipse-based Tutorial: Java File Upload Servlet with Apache Common File Upload
- Details
- Written by Nam Ha Minh
- Last Updated on 26 June 2019 | Print Email
- An upload form that allows user to pick up a file to upload.
- A Java servlet that parses the request and saves the uploaded file as a permanent file on the server.
- A message page that shows successful/error messages.
1. Setting up environment
Before moving on, make sure you got the following software installed on your computer (of course you can use newer versions):- Tomcat 6.0 or newer.
- JDK/JRE 6.0 or newer.
- Eclipse IDE for Java EE Developers (Helios 3.6.2) or newer.
- Apache Common File Upload 1.2.2 and Apache Commons IO 2.3
2. Setting up Eclipse project
2.1. Creating new project
In Eclipse’s Java EE perspective, select File>New Dynamic Web Project from main menu. In the dialog New Dynamic Web Project, type UploadServletApp as Project name. Select 2.5 from the dropdown list Dynamic web module version: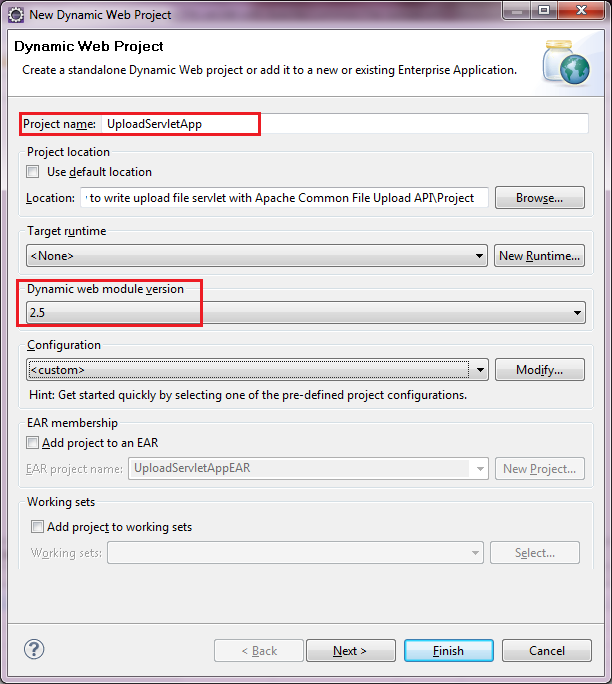
2.2. Creating Java package
Under src directory, create a new Java package called net.codejava.upload. The project’s initial structure should look like this: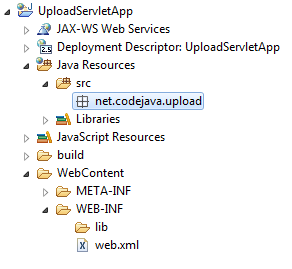
2.3. Adding Tomcat server
Skip this step you have Tomcat already appears in the Servers view.Switch to Server views (Select Windows > Show View > Others > Servers from main menu). Right click in the Servers view, select New > Server: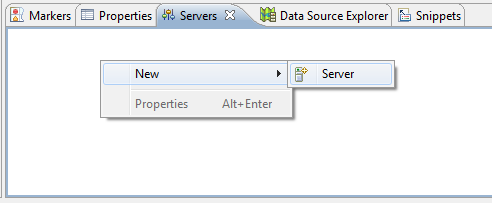 In the dialog New Server, select Tomcat v6.0 Server. Click Next:
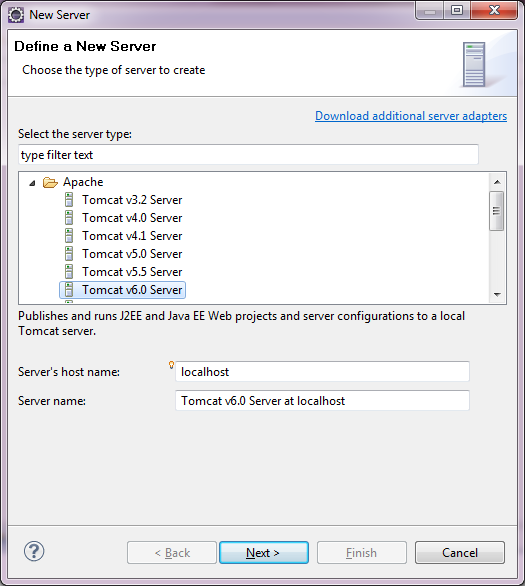 In the next screen, click Browse button to select Tomcat’s installation directory on your computer:
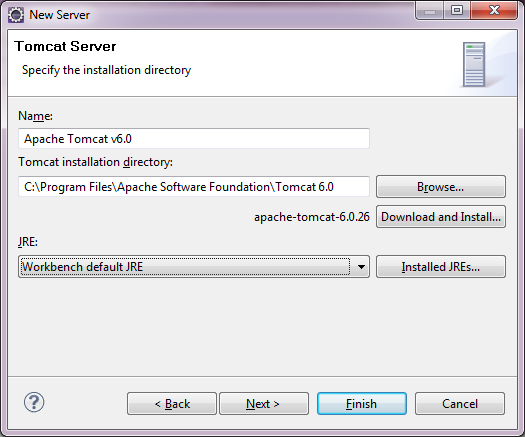 NOTES: You may not see this screen if you used Tomcat before, as Eclipse remembers Tomcat installation directory so it won’t ask you.Click Next. In the Add and Remove screen, select UploadServletApp on the left and click Add button to move in to the right:
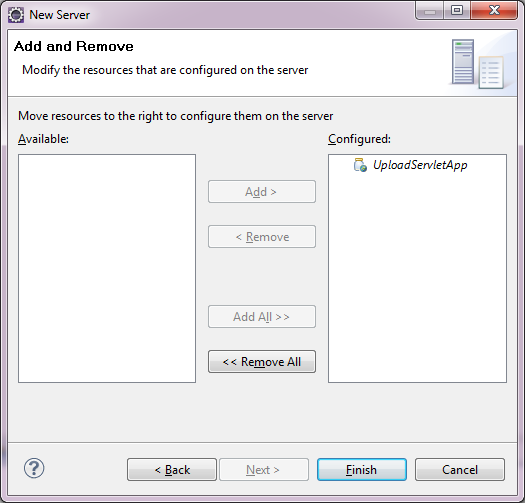 Click Finish, the application UploadServletApp is now configured to run on Tomcat.
 2.4. Making server runtime available to the project
Tomcat provides API to work with Java servlets, so we need to make that API available to the project. Select Project>Properties from main menu. In the dialog Properties for UploadServletApp, select Targeted Runtimes on the left, and check Apache Tomcat v6.0 on the right: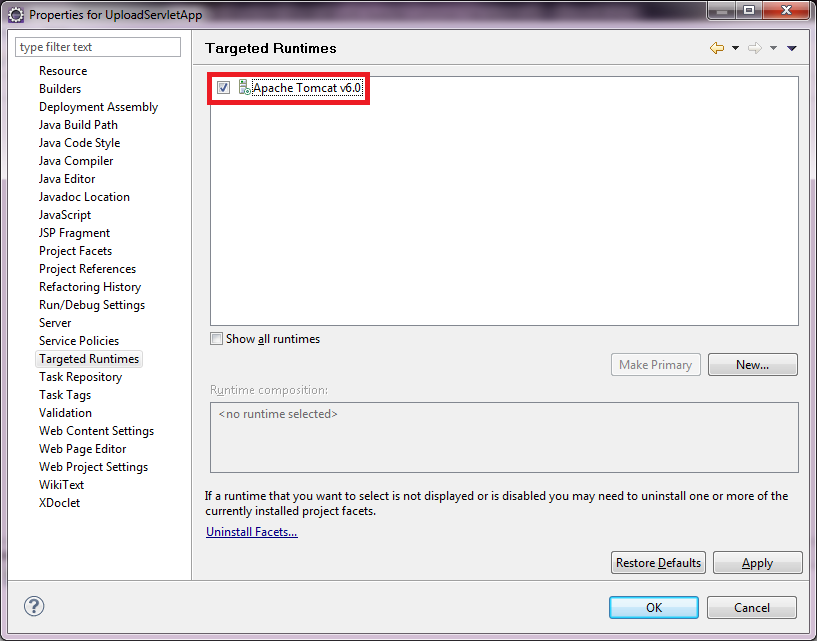
2.5. Adding required libraries to the project
Copy two JAR files commons-fileupload-1.2.2.jar and commons-io-2.3.jar to WebContent\WEB-INF\lib directory under project directory. The Common File Upload API will be available to the project and packaged together with the application when creating a WAR file.2.6. Testing Tomcat server
In the Servers view, click on the Start button to start Tomcat: Then switch to Console view, if you see the last line looks like:INFO: Server startup in 289 msThat means the server has started successfully.And pay attention at the line looks like this:INFO: Starting Coyote HTTP/1.1 on http-8080That means the server is listening on the port number 8080.
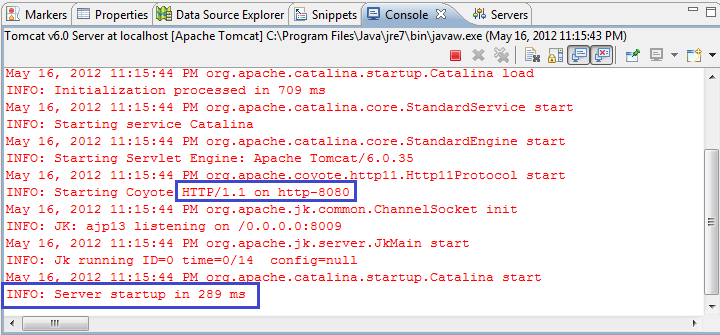
3. Coding File Upload form
We need to create a JSP page that shows a form which allows user to pick up a file to upload. Right-click on WebContent directory, select New > JSP File from context menu. In the New JSP File dialog, enter name of the JSP page as “upload” under File name field: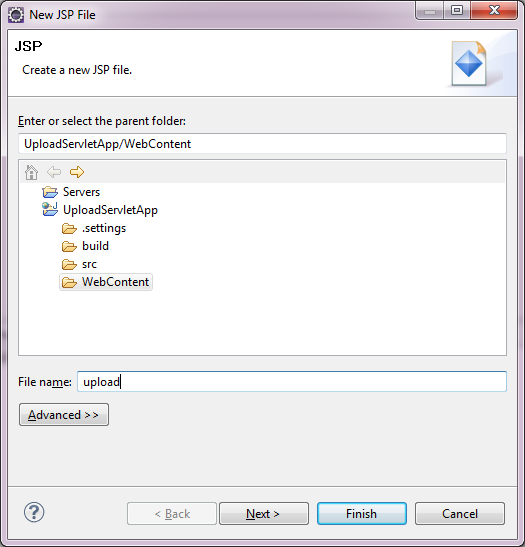 Click Finish. The upload.jsp file is created under WebContent directory.Write code for the upload.jsp file as follows:
<%@ page language="java" contentType="text/html; charset=UTF-8"
	pageEncoding="UTF-8"%>
<!DOCTYPE html PUBLIC "-//W3C//DTD HTML 4.01 Transitional//EN"
	"http://www.w3.org/TR/html4/loose.dtd">
<html>
<head>
<meta http-equiv="Content-Type" content="text/html; charset=UTF-8">
<title>File Upload</title>
</head>
<body>
	<center>
		<form method="post" action="UploadServlet" enctype="multipart/form-data">
			Select file to upload: <input type="file" name="uploadFile" />
			<br/><br/>
			<input type="submit" value="Upload" />
		</form>
	</center>
</body>
</html>
As you can see, the JSP code is pure HTML. Some noteworthy points are explained as follows:
- The form tag defines the following properties:
- method=”post”: when submitting, form’s data is sent to server using HTTP POST method. This is required for uploading file because file’s content can be sent only via POST method.
- action=”UploadServlet”: specifies a relative path on the server that handles file upload. In this case, we use the path UploadServlet mapped to a Java servlet that handles file upload.
- enctype="multipart/form-data": tells the browser that this form may contain upload data so the browser handles accordingly.
- The input tag (type = “file”) displays a text field and a Browse button which allows the user to select a file from his computer.
- The input tag (type = “submit”) displays a submit button labeled as “Upload”.
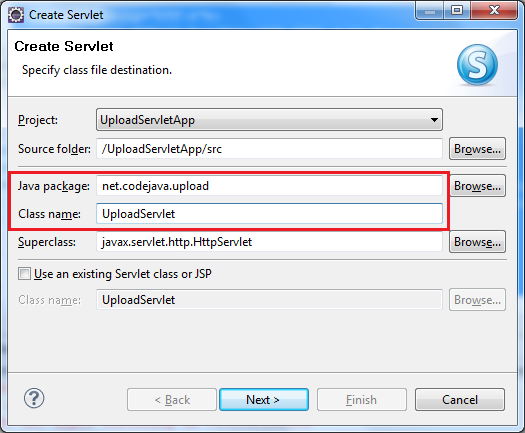
Next, we create a servlet to handle file upload from the upload.jsp page.4. Creating the Servlet
Select File > New > Servlet from main menu. In the Create Servlet dialog:- Type or browse the package net.codejava.upload in the field Java package.
- Type UploadServlet into the field Class name.
Click Next. The next screen lets reviewing name and URL mapping of the servlet:
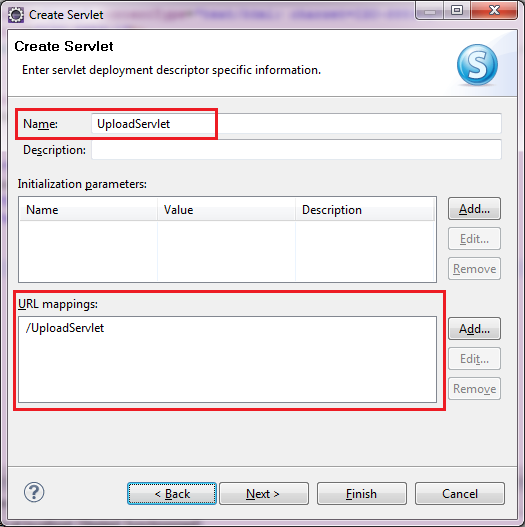
Note that the URL mapping in this screen must match the value of the action attribute of the form defined in the upload.jsp page:
<form method="post" action="UploadServlet" enctype="multipart/form-data">Click Next. The last screen let us determine which methods need to be generated:
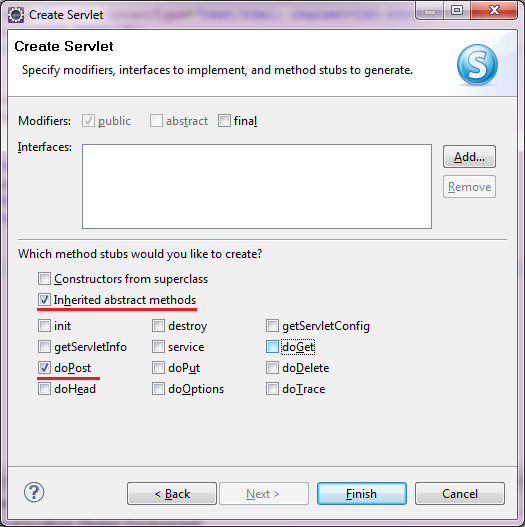 The only method we need to implement in the servlet is doPost(), so let check only two check boxes:
- Inherited abstract methods.
- doPost.
package com.upload;

import java.io.IOException;
import javax.servlet.ServletException;
import javax.servlet.http.HttpServlet;
import javax.servlet.http.HttpServletRequest;
import javax.servlet.http.HttpServletResponse;

/**
 * Servlet implementation class UploadServlet
 */
public class UploadServlet extends HttpServlet {
	private static final long serialVersionUID = 1L;

	/**
	 * @see HttpServlet#doPost(HttpServletRequest request, HttpServletResponse
	 *      response)
	 */
	protected void doPost(HttpServletRequest request,
			HttpServletResponse response) throws ServletException, IOException {
		// TODO Auto-generated method stub
	}
}
5. Implementing code to handle file upload
It’s time to write actual code for the UploadServlet class to read upload data and save it as a file on disk. We implement the code in the servlet’s doPost() method.5.1. Defining constants
We define some constants in the servlet as follows:private static final String UPLOAD_DIRECTORY = "upload"; private static final int THRESHOLD_SIZE = 1024 * 1024 * 3; // 3MB private static final int MAX_FILE_SIZE = 1024 * 1024 * 40; // 40MB private static final int MAX_REQUEST_SIZE = 1024 * 1024 * 50; // 50MBThese constants will be used to configure upload settings.
- UPLOAD_DIRECTORY: name of the directory on the server where upload file will be stored. The directory is chosen to be relative to the web application’s directory.
- THRESHOLD_SIZE: file that has size less than this threshold value will be saved into memory. If the size is greater than this value, it will be stored on disk, temporarily. The value is measured in bytes.
- MAX_FILE_SIZE: specifies the maximum size of an upload file. We define this constant to hold a file up to 40MB.
- MAX_REQUEST_SIZE: specifies the maximum size of a HTTP request which contains the upload file and other form’s data, so this constant should be greater than the MAX_FILE_SIZE.
All sizes are measured in bytes.
5.2. Checking if the request having upload data
Place the following lines of code at the beginning of doPost() method:// checks if the request actually contains upload file
if (!ServletFileUpload.isMultipartContent(request)) {
PrintWriter writer = response.getWriter();
writer.println("Request does not contain upload data");
writer.flush();
return;
}That checks if the request contains upload data (indicated by the attribute enctype="multipart/form-data" of the upload form). If not, we print a message to the user and exit the method. 5.3. Configuring upload settings
Next, we configure some settings using the constants defined previously:// configures upload settings
DiskFileItemFactory factory = new DiskFileItemFactory();
factory.setSizeThreshold(THRESHOLD_SIZE);
factory.setRepository(new File(System.getProperty("java.io.tmpdir")));
ServletFileUpload upload = new ServletFileUpload(factory);
upload.setFileSizeMax(MAX_FILE_SIZE);
upload.setSizeMax(MAX_REQUEST_SIZE);The DiskFileItemFactory class manages file content either in memory or on disk. We call setSizeThreshold() method to specify the threshold above which files are stored on disk, under the directory specified by the method setRepository(). In the above code, we specify the temporary directory available for Java programs. Files are stored temporarily in that directory and they will be deleted. So we need to copy the files from the temporary directory to a desired location.The ServletFileUpload is the main class that handles file upload by parsing the request and returning a list of file items. It is also used to configure the maximum size of a single file upload and maximum size of the request, by the methods setFileSizeMax()and setSizeMax() respectively. 5.4. Creating directory to store upload file
Because upload files are stored temporarily under a temporary directory, we need to save them under another directory permanently. The following code creates a directory specified by the constant UPLOAD_DIRECTORY under web application’s root directory, if it does not exist:// constructs the directory path to store upload file
String uploadPath = getServletContext().getRealPath("")
+ File.separator + UPLOAD_DIRECTORY;
// creates the directory if it does not exist
File uploadDir = new File(uploadPath);
if (!uploadDir.exists()) {
uploadDir.mkdir();
}NOTES: It’s not recommended to save files under the directory relative to application’s directory, because when re-deploying/un-deploying the application, all files may be lost. We use this approach for demo purpose only. In practice, you should consider storing files in a location which is independent of the application. 5.5. Reading upload data and save to file
And this is the most important code: parsing the request to save upload data to a permanent file on disk:List formItems = upload.parseRequest(request);
Iterator iter = formItems.iterator();
// iterates over form's fields
while (iter.hasNext()) {
FileItem item = (FileItem) iter.next();
// processes only fields that are not form fields
if (!item.isFormField()) {
String fileName = new File(item.getName()).getName();
String filePath = uploadPath + File.separator + fileName;
File storeFile = new File(filePath);
// saves the file on disk
item.write(storeFile);
}
}The parseRequest() method of ServletFileUpload class returns a list of form items which will be iterated to identify the item (represented by a FileItem object) which contains file upload data. The method isFormField()of FileItem class checks if an item is a form field or not. A non-form field item may contain upload data, thus the check:if (!item.isFormField()) {
}And to save the file on disk, we call the write(File) method of FileItem class. 6. Coding message page
Create a new JSP page called message.jsp under WebContent directory and paste the following code:<%@ page language="java" contentType="text/html; charset=UTF-8"
pageEncoding="UTF-8"%>
<!DOCTYPE html PUBLIC "-//W3C//DTD HTML 4.01 Transitional//EN"
"http://www.w3.org/TR/html4/loose.dtd">
<html>
<head>
<meta http-equiv="Content-Type" content="text/html; charset=UTF-8">
<title>Upload</title>
</head>
<body>
<center>
<h2>${requestScope.message}</h2>
</center>
</body>
</html>The purpose of the message.jsp page is to show value of a property called “message” present in the request scope, using expression language (EL): ${requestScope.message}We will pass the actual message from the servlet code. 6.1. Showing messages to the user
It’s necessary to show a message to the user to indicate whether the upload is done or there’s an error occurred.In case the upload has been done successfully:request.setAttribute("message", "Upload has been done successfully!");And in the other case, there was an error occurred:request.setAttribute("message", "There was an error: " + ex.getMessage());Finally, the following code redirects the user to the message.jsp page:getServletContext().getRequestDispatcher("/message.jsp").forward(request, response); 7. Full code of the servlet class
The following is complete source code of the UploadServlet.java class:package net.codejava.upload;
import java.io.File;
import java.io.IOException;
import java.io.PrintWriter;
import java.util.Iterator;
import java.util.List;
import javax.servlet.ServletException;
import javax.servlet.http.HttpServlet;
import javax.servlet.http.HttpServletRequest;
import javax.servlet.http.HttpServletResponse;
import org.apache.commons.fileupload.FileItem;
import org.apache.commons.fileupload.disk.DiskFileItemFactory;
import org.apache.commons.fileupload.servlet.ServletFileUpload;
/**
* A Java servlet that handles file upload from client.
* @author www.codejava.net
*/
public class UploadServlet extends HttpServlet {
private static final long serialVersionUID = 1L;
private static final String UPLOAD_DIRECTORY = "upload";
private static final int THRESHOLD_SIZE 	= 1024 * 1024 * 3; 	// 3MB
private static final int MAX_FILE_SIZE 		= 1024 * 1024 * 40; // 40MB
private static final int MAX_REQUEST_SIZE 	= 1024 * 1024 * 50; // 50MB
/**
* handles file upload via HTTP POST method
*/
protected void doPost(HttpServletRequest request,
HttpServletResponse response) throws ServletException, IOException {
// checks if the request actually contains upload file
if (!ServletFileUpload.isMultipartContent(request)) {
	PrintWriter writer = response.getWriter();
	writer.println("Request does not contain upload data");
	writer.flush();
	return;
}
// configures upload settings
DiskFileItemFactory factory = new DiskFileItemFactory();
factory.setSizeThreshold(THRESHOLD_SIZE);
factory.setRepository(new File(System.getProperty("java.io.tmpdir")));

ServletFileUpload upload = new ServletFileUpload(factory);
upload.setFileSizeMax(MAX_FILE_SIZE);
upload.setSizeMax(MAX_REQUEST_SIZE);
// constructs the directory path to store upload file
String uploadPath = getServletContext().getRealPath("")
	+ File.separator + UPLOAD_DIRECTORY;
// creates the directory if it does not exist
File uploadDir = new File(uploadPath);
if (!uploadDir.exists()) {
	uploadDir.mkdir();
}
try {
// parses the request's content to extract file data
List formItems = upload.parseRequest(request);
Iterator iter = formItems.iterator();

// iterates over form's fields
while (iter.hasNext()) {
	FileItem item = (FileItem) iter.next();
	// processes only fields that are not form fields
	if (!item.isFormField()) {
		String fileName = new File(item.getName()).getName();
		String filePath = uploadPath + File.separator + fileName;
		File storeFile = new File(filePath);

		// saves the file on disk
		item.write(storeFile);
	}
}
request.setAttribute("message", "Upload has been done successfully!");
} catch (Exception ex) {
request.setAttribute("message", "There was an error: " + ex.getMessage());
}
getServletContext().getRequestDispatcher("/message.jsp").forward(request, response);
}
}As you can see, the code that parses the request and saves upload data is placed inside a try-catch block. In case of exception, we set an error message as value for the “message” object. And finally, the servlet forwards user to the message.jsp page. 8.The generated web.xml file
Although we don’t touch the web.xml file at all, Eclipse generated the code looks like this:<?xml version="1.0" encoding="UTF-8"?>
<web-app xmlns:xsi="http://www.w3.org/2001/XMLSchema-instance"
xmlns="http://java.sun.com/xml/ns/javaee"
xmlns:web="http://java.sun.com/xml/ns/javaee/web-app_2_5.xsd"
xsi:schemaLocation="http://java.sun.com/xml/ns/javaee
http://java.sun.com/xml/ns/javaee/web-app_2_5.xsd"
id="WebApp_ID" version="2.5">
<display-name>UploadServletApp</display-name>
<servlet>
<description></description>
<display-name>UploadServlet</display-name>
<servlet-name>UploadServlet</servlet-name>
<servlet-class>net.codejava.upload.UploadServlet</servlet-class>
</servlet>
<servlet-mapping>
<servlet-name>UploadServlet</servlet-name>
<url-pattern>/UploadServlet</url-pattern>
</servlet-mapping>
</web-app> 9. Testing the application
So far we have done the coding part. It’s time to take a test to verify the application. Make sure Tomcat is started, open a new browser window and type the following URL into the address bar:http://localhost:8080/UploadServletApp/upload.jsp
The upload form is displayed as follows: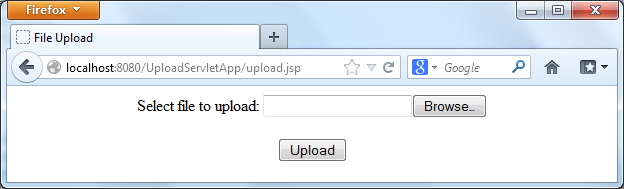 Click Browse button and select any file on your computer, then hit Upload button. A message page is displayed to indicate the upload has been successful:
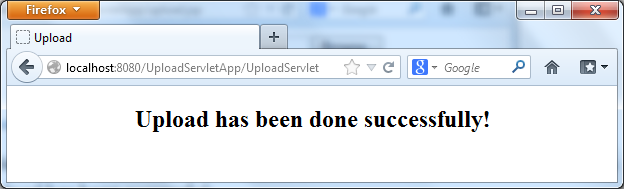 To check if the file is saved successfully to a desired location, verify the file is present inside upload directory which is created under UploadServletApp directory on the server. In case of this tutorial, since the server is running inside Eclipse, the file is saved under this location:WORKSPACE\.metadata\.plugins\
org.eclipse.wst.server.core\
tmp0\wtpwebapps\UploadServletApp\upload
If you deployed the application on Tomcat outside Eclipse, the file would be stored under:c:\Program Files\Apache Software Foundation\Tomcat 6.0\webapps\UploadServletApp\uploadRelated File Upload Tutorials:
- Java File Upload Example with Servlet 3.0 API
- Spring MVC File Upload Tutorial with Eclipse IDE
- Upload file with Struts
- Upload files to database (Servlet + JSP + MySQL)
- Upload Files to Database with Spring MVC and Hibernate
Other Java Servlet Tutorials:
- Java Servlet Quick Start for beginners (XML)
- Java Servlet for beginners (annotations)
- Handling HTML form data with Java Servlet
- Java File Download Servlet Example
About the Author:
 Nam Ha Minh is certified Java programmer (SCJP and SCWCD). He began programming with Java back in the days of Java 1.4 and has been passionate about it ever since. You can connect with him on Facebook and watch his Java videos on YouTube.
| [Deployable WAR file] | 218 kB | |
| [Eclipse project] | 225 kB |
Comments
So you can use Apache POI library for reading/writing Excel files. References:
- Read Excel: codejava.net/.../...
- Write Excel: codejava.net/.../...