How to configure session timeout in Tomcat
- Details
- Written by Nam Ha Minh
- Last Updated on 06 August 2019 | Print Email
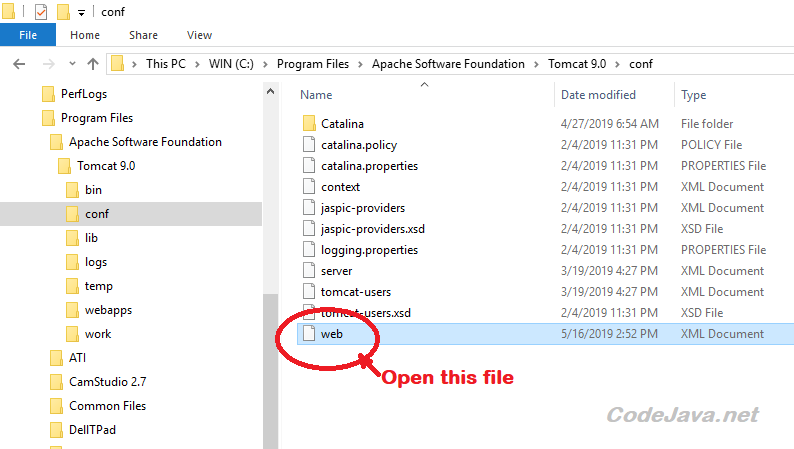
To modify the default session timeout value for all Java web application deployed on Apache Tomcat server, open the web.xml file in the conf directory in Tomcat installation location – typically under this path on Windows:
c:\Program Files\Apache Software Foundation\Tomcat 9.0\conf\

Open the web.xml file using a text editor. Search for the session-timeout keyword (include the hyphen) and you will see this section:
<session-config>
    <session-timeout>30</session-timeout>
</session-config>
Now you change the session timeout to a value you wish, in minutes (you can see the default time out value is 30 minutes).
Save the file and restart the server for the change takes effect. All web applications that do not override session timeout configuration will be affected.
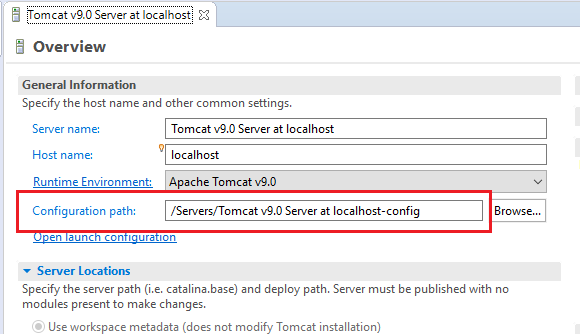
NOTE: If you are running Tomcat in Eclipse IDE, you need to edit the web.xml file in different location, as Eclipse makes a copy of server configuration files in the workspace, typically in this path:
/Servers/Tomcat v9.0 Server at localhost-config
You can check the exact path in Eclipse by double clicking on the server name in the Servers view to open the Server editor. Look for the path under Configuration path, as shown below:

To change session time out value for a specific web application, read this article.
Other Tomcat Tutorials:
- How to deploy a Java web application on Tomcat
- How to Embed Tomcat Server into Java Web Applications
- How to Use Virtual Hosts in Tomcat
- How to set web application context path as server root in Tomcat
- How to configure JNDI DataSource for Database Connection Pooling in Tomcat
- How to change server location and deploy path for Tomcat in Eclipse
- How to change Tomcat port number
- How to add Tomcat server in Eclipse
About the Author:
 Nam Ha Minh is certified Java programmer (SCJP and SCWCD). He began programming with Java back in the days of Java 1.4 and has been passionate about it ever since. You can connect with him on Facebook and watch his Java videos on YouTube.
Comments