How to Install OpenSSL Library on Windows
- Details
- Written by Nam Ha Minh
- Last Updated on 21 October 2024 | Print Email
Are you stuck in setting up the OpenSSL library on a Windows operating system? What is the right and official way to install OpenSSL? Are you wondering why it is so difficult? You’ve come to the right place! In this article, I will show you an easy way to install OpenSSL on Windows.
OpenSSL is an open-source cryptographic toolkit widely used to implement secure communication and encryption based on Transport Layer Security (TLS) and Secure Sockets Layer (SSL). You can use it to generate and install SSL certificates for web servers, create private keys, verify certificates, and perform more cryptographic operations.
Follow the steps below to install OpenSSL on your Windows OS.
1. Download Windows Installer for OpenSSL
If you visit the official OpenSSL website and OpenSSL library, you’ll notice that it seemingly provides only the source code and you would need to build the binaries from the source! Of course, you just want to use the tool right away and might be hesitant of going through the complexities of building the code, right? There should be an easier way.
No worries. I’ll save you time by pointing out this OpenSSL binaries download page from third-party distributions:
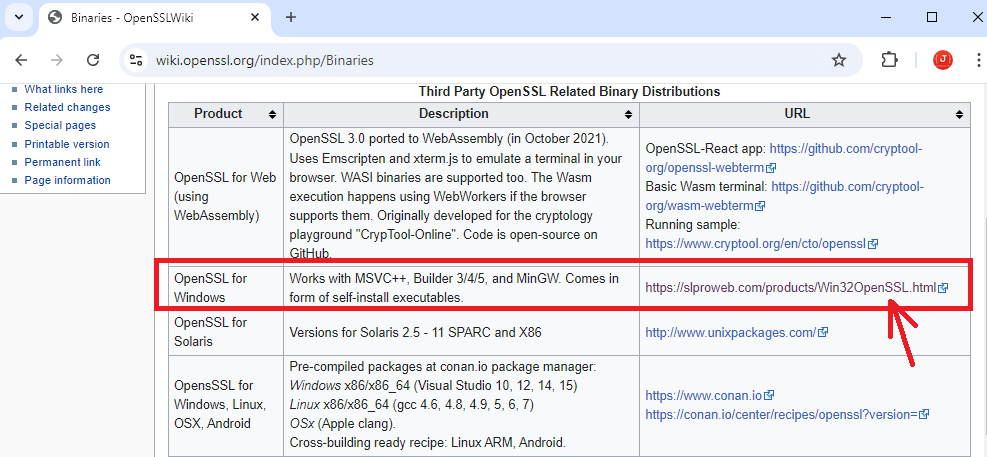
As you can see, there are several binary distribution (installers) of OpenSSL, but I recommend downloading the second one on the list (OpenSSL for Windows). So click this link to go to the download page, as shown below:
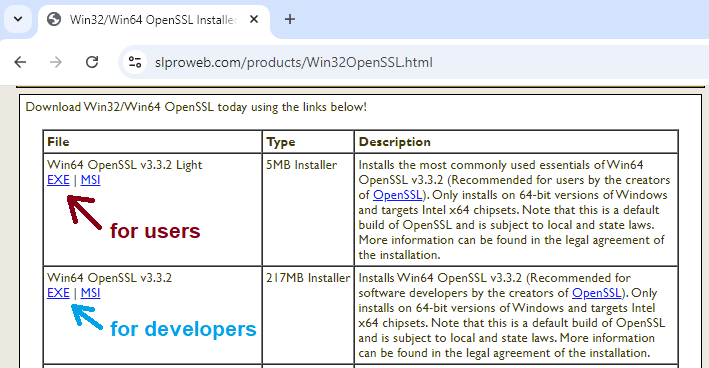
This is an OpenSSL distribution provided by Shining Light Productions. And there are 2 types of installers for the 64-bit Windows operating system:
- Win64 OpenSSL v3.3.2 Light: this installer is recommended for users.
- Win64 OpenSSL v3.3.2: this installer is recommended for software developers.
If you only need the essential features of the OpenSSL library, download the Light version (5MB). However, if you want to use advanced features, download the full installer (217MB). Since I am just an end user of OpenSSL, I clicked on the EXE link to download the Win64 OpenSSL Light installer.
2. Set up OpenSSL on Windows
Double-click the downloaded EXE file to launch the installer. Click Install anyway if you see the warning message ‘The app you’re trying to install isn’t a Microsoft-verified app’. The setup program for OpenSSL 3.3.2 Light (64-bit) will appear as follows:
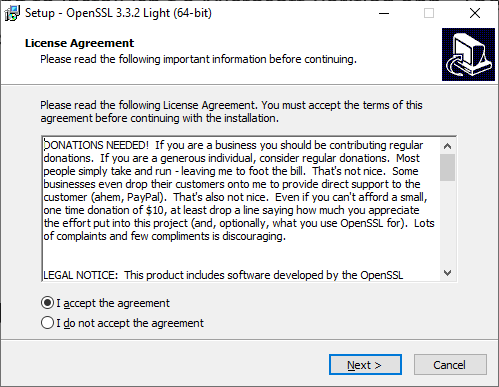
Check “I accept the agreement” and click Next 3 times to proceed with the installation using the default settings, which will install OpenSSL binaries into the C:\Program Files\OpenSSL-Win64 directory and copy the OpenSSL DLLs to the Windows system directory. Then, click the Finish button to close the setup wizard. It’s quick and easy, isn’t it?
3. Verify the OpenSSL Installation
Press the Windows Start button, and type openssl. Click the result that shows “Win64 OpenSSL Command Prompt”:
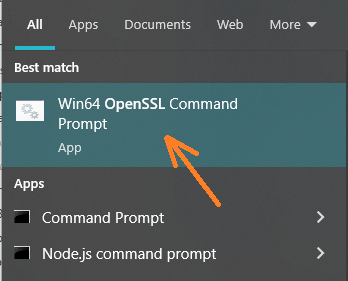
It will open up a new command prompt window that is customized for using the OpenSSL library. When you see the following screen, it means you have successfully installed OpenSSL on your Windows operating system:
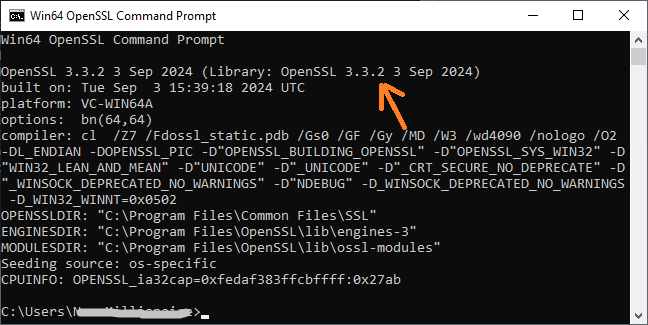
You can also type openssl -version to verify, and it will print the full version of the library in the command prompt. This means that openssl is the command-line tool used to perform cryptographic operations.
NOTES: If you want to use the openssl command-line tool anywhere in the Windows Command prompt, watch the following video to learn how:
About the Author:
 Nam Ha Minh is certified Java programmer (SCJP and SCWCD). He began programming with Java back in the days of Java 1.4 and has been passionate about it ever since. You can connect with him on Facebook and watch his Java videos on YouTube.
Comments