Struts Beginner Tutorial with Annotations
- Details
- Written by Nam Ha Minh
- Last Updated on 01 August 2019 | Print Email
- Struts beginner tutorial (Eclipse + Tomcat + XML)
- Struts beginner tutorial with Convention Plugin (zero-configuration)
1. Struts Annotations for Action Mapping
To replace XML configuration for actions and results, the Struts framework provides the following primary annotations:- @Namespace: specifies prefix for action URLs.
- @Action: specifies configuration for an action such as URL pattern and results.
- @Result: specifies a result mapping which includes a logical view name and a physical view page.
- @ResultPath: specifies location to pick the physical view page specified by the @Result annotation.
2. Quick Struts Annotations Examples
Here are some quick examples that help you understand usages of the annotations above.2.1. Annotating only the action class
The following code snippet shows an annotated action class:@Action(
value = "login",
results = {
@Result(name = "success", location = "/WEB-INF/jsp/Login.jsp")
}
)
public class LoginAction extends ActionSupport {
// empty
}Mapped URL: http://localhost:8080/login2.2. Annotating only the action method
The following example shows the default action method execute() is annotated:public class HelloAction extends ActionSupport{
@Action(
value = "/hello",
results = {
@Result(name = "success", location = "/WEB-INF/jsp/Hello.jsp")
}
)
public String execute() {
return SUCCESS;
}
}Mapped URL: http://localhost:8080/hello 2.3. Annotating both the class and action method
The following code snippet shows the annotations are used at both class level and method level:@Result(name = "success", location = "/WEB-INF/jsp/Hello.jsp")
public class HelloAction extends ActionSupport{
@Action(value = "/hello")
public String execute() {
return SUCCESS;
}
}Mapped URL: http://localhost:8080/hello 2.4. Using all annotations separately
The following example shows the @Action, @ResultPath and @Result annotations are used separately on the action class:@Action("/order")
@ResultPath("/WEB-INF/jsp")
@Result(name = "success", location = "Order.jsp")
public class OrderAction extends ActionSupport {
}Mapped URL: http://localhost:8080/helloView location: /WEB-INF/jsp 2.5. Using namespace
The following code snippet illustrates how the @Namespaceannotation is used:@Namespace("/product")
@Action("/list")
@ResultPath("/WEB-INF/jsp")
@Result(name = "success", location = "Products.jsp")
public class ProductsAction extends ActionSupport {
}Mapped URL: http://localhost:8080/product/listView location: /WEB-INF/jsp/product 2.6. Handling form input
The following code example illustrates an action class is annotated for handling form input (Note that one @Result is for mapping input form; and the another is for mapping result page):@Action(
value = "doLogin",
results = {
@Result(name = "input", location = "/WEB-INF/jsp/Login.jsp"),
@Result(name = "success", location = "/WEB-INF/jsp/Hello.jsp")
}
)
public class DoLoginAction extends ActionSupport {
private User user;
public String execute() {
if ("nimda".equals(user.getPassword())) {
return SUCCESS;
} else {
return INPUT;
}
}
public User getUser() {
return user;
}
public void setUser(User user) {
this.user = user;
}
}Mapped URL: http://localhost:8080/doLogin 2.7. Multi-actions in a single class
The following example shows a single class handling multiple actions:public class MultiAction extends ActionSupport {
@Action(
value = "/bonjour",
results = {
@Result(name = "success", location = "/WEB-INF/jsp/Hello.jsp")
}
)
public String hello() {
return SUCCESS;
}
@Action(
value = "/listOrder",
results = {
@Result(name = "success", location = "/WEB-INF/jsp/Order.jsp")
}
)
public String order() {
return SUCCESS;
}
}Mapped URLs:- http://localhost:8080/hello
- http://localhost:8080/listOrder
3. Developing a Sample Application
Now, let’s see how to build a Struts application using annotations step by step. It displays a login form. When the user provides the correct password, he will be redirected to a welcome page.The sample application in this tutorial is developed and tested with Java 8, Struts 2.3.20, Eclipse Luna, and Tomcat 8.3.1. Adding Maven Dependencies
Add the following dependencies in your pom.xml file:- Struts Core:
<dependency> <groupId>org.apache.struts</groupId> <artifactId>struts2-core</artifactId> <version>2.3.20</version> </dependency>
- Struts Convention Plug-in:
<dependency> <groupId>org.apache.struts</groupId> <artifactId>struts2-convention-plugin</artifactId> <version>2.3.20</version> </dependency>
3.2. Coding Input Page
Create the Login.jsp file with the following code:
<%@ page language="java" contentType="text/html; charset=UTF-8"
pageEncoding="UTF-8"%>
<%@ taglib prefix="s" uri="/struts-tags" %>
<!DOCTYPE html PUBLIC "-//W3C//DTD HTML 4.01 Transitional//EN"
"http://www.w3.org/TR/html4/loose.dtd">
<html>
<head>
<meta http-equiv="Content-Type" content="text/html; charset=UTF-8">
<title>Login</title>
</head>
<body>
<div align="center">
<h2>Login Form</h2>
<s:form action="doLogin" method="post">
<s:textfield name="user.email" label="E-mail" />
<s:password name="user.password" label="Password" />
<s:submit value="Login" />
</s:form>
</div>
</body>
</html>Here, we use Struts’ form tags to create the login form.
3.3. Coding Model Class
Create the User.java class with the following code:
package net.codejava.struts;
public class User {
private String email;
private String password;
public String getEmail() {
return email;
}
public void setEmail(String email) {
this.email = email;
}
public String getPassword() {
return password;
}
public void setPassword(String password) {
this.password = password;
}
}Struts will create an object of this class in order to map form fields to a Java object in the action class.
3.4. Coding Action Classes
Write code for the action class that brings the user to the login form (LoginAction.java):
package net.codejava.struts;
import org.apache.struts2.convention.annotation.Action;
import org.apache.struts2.convention.annotation.Result;
import com.opensymphony.xwork2.ActionSupport;
@Action(
	value = "login",
	results = {
			@Result(name = "success", location = "/WEB-INF/jsp/Login.jsp")
	}
)
public class LoginAction extends ActionSupport {
	// empty
}This action handles the URL: http://localhost:8080/login
Write code for the action class handles login form (DoLoginAction.java):
package net.codejava.struts;

import org.apache.struts2.convention.annotation.Action;
import org.apache.struts2.convention.annotation.Result;

import com.opensymphony.xwork2.ActionSupport;


@Action(
	value = "doLogin",
	results = {
			@Result(name = "input", location = "/WEB-INF/jsp/Login.jsp"),
			@Result(name = "success", location = "/WEB-INF/jsp/Welcome.jsp")
	}
)
public class DoLoginAction extends ActionSupport {
	private User user;

	public String execute() {
		if ("nimda".equals(user.getPassword())) {
			return SUCCESS;
		} else {
			return INPUT;
		}
	}

	public User getUser() {
		return user;
	}

	public void setUser(User user) {
		this.user = user;
	}

}
This action handles the URL (POST): http://localhost:8080/doLogin
3.5. Creating Result Page
The result page (Welcome.jsp) is pretty simple as follows:<%@ page language="java" contentType="text/html; charset=UTF-8"
pageEncoding="UTF-8"%>
<!DOCTYPE html PUBLIC "-//W3C//DTD HTML 4.01 Transitional//EN"
"http://www.w3.org/TR/html4/loose.dtd">
<html>
<head>
<meta http-equiv="Content-Type" content="text/html; charset=UTF-8">
<title>Welcome Home</title>
</head>
<body>
<div align="center">
<h1>Welcome Home!</h1>
</div>
</body>
</html>It simply displays a welcome message. 3.6. Configure Struts Dispatcher Filter via web.xml
To allow the Struts framework intercepts all requests coming to the application, configure the Struts’ dispatcher filter in the web deployment descriptor file as following:<?xml version="1.0" encoding="UTF-8"?>
<web-app xmlns:xsi="http://www.w3.org/2001/XMLSchema-instance"
xmlns="http://java.sun.com/xml/ns/javaee"
xsi:schemaLocation="http://java.sun.com/xml/ns/javaee
http://java.sun.com/xml/ns/javaee/web-app_3_0.xsd" id="WebApp_ID" version="3.0">
<display-name>Struts2AnnotationsExample</display-name>
<filter>
<filter-name>struts2</filter-name>
<filter-class>
org.apache.struts2.dispatcher.ng.filter.StrutsPrepareAndExecuteFilter
</filter-class>
</filter>
<filter-mapping>
<filter-name>struts2</filter-name>
<url-pattern>/*</url-pattern>
</filter-mapping>
</web-app> 3.7. Testing the Application
Assuming that you deployed the application on Tomcat server, type the following URL to accessing the login page:http://localhost:8080/Struts2AnnotationsExample/login
The login page appears as follows: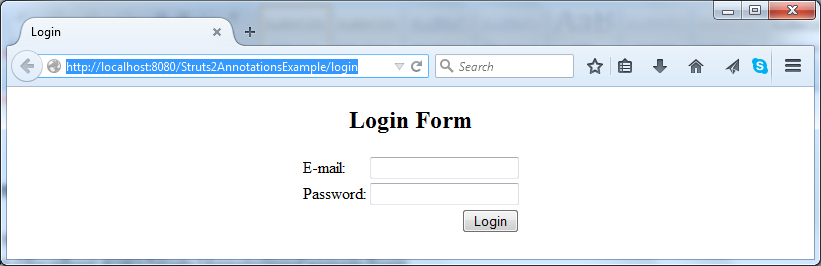 Enter any email address but the password must be “nimda”, and then hit Enter. The welcome page appears as the following screenshot:
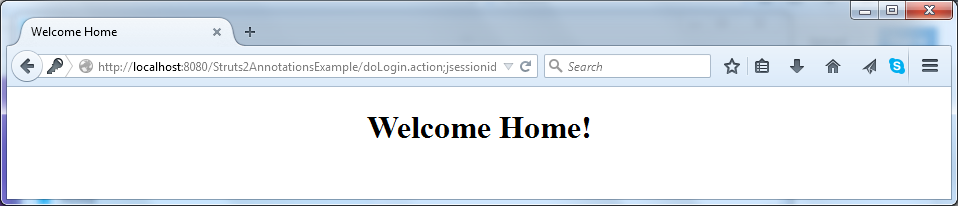 Congratulations! You have done a simple Struts application that uses annotations. For your convenience, we attached the sample project (Eclipse) which you can download in the Attachments section. See you in the next Struts tutorial. References:
 Related Struts Hello World Tutorials:
- Introduction to Struts framework
- Struts beginner tutorial (Eclipse + Tomcat + XML)
- Struts beginner tutorial with Convention Plugin (zero-configuration)
Other Struts Tutorials:
- How to handle exceptions in Struts
- How to use log4j in Struts
- Send e-mail with attachments in Struts
- Struts File Download Tutorial
- Struts File Upload Tutorial
- Struts - Spring - Hibernate Integration Tutorial
About the Author:
 Nam Ha Minh is certified Java programmer (SCJP and SCWCD). He began programming with Java back in the days of Java 1.4 and has been passionate about it ever since. You can connect with him on Facebook and watch his Java videos on YouTube.
| [Struts2 Annotation Sample Project (Eclipse)] | 23 kB |